Xero Integration (Beta)
Enabling the Xero integration for your organization allows seamless synchronization between Finmo and Xero.
Features
- Sync your transactions directly to Xero.
- Manage and reconcile Accounts Receivable (AR) and Accounts Payable (AP) across both platforms.
- Automatically import and sync required prerequisites, including Chart of Accounts, Items, and Tax Rates. This integration ensures that your financial data remains accurate, consistent, and up to date across systems.
- Bulk Sync AR & AP from Finmo to Xero.
This integration ensures that your financial data remains accurate, consistent, and up to date across systems.
Xero Integration Setup
This section outlines the steps to connect your Xero account with Finmo, enabling transaction sync as well as AR and AP synchronization between the two platforms.
This functionality is available upon request. Please reach out to your Account Manager to have it enabled. This functionality is available only in the Production environment.
- Once your Account Manager activates the Xero Integration, a Integrations tab will appear under the Settings section.
- Click the Integrations tab to access the section where you can view the Xero Integration card.
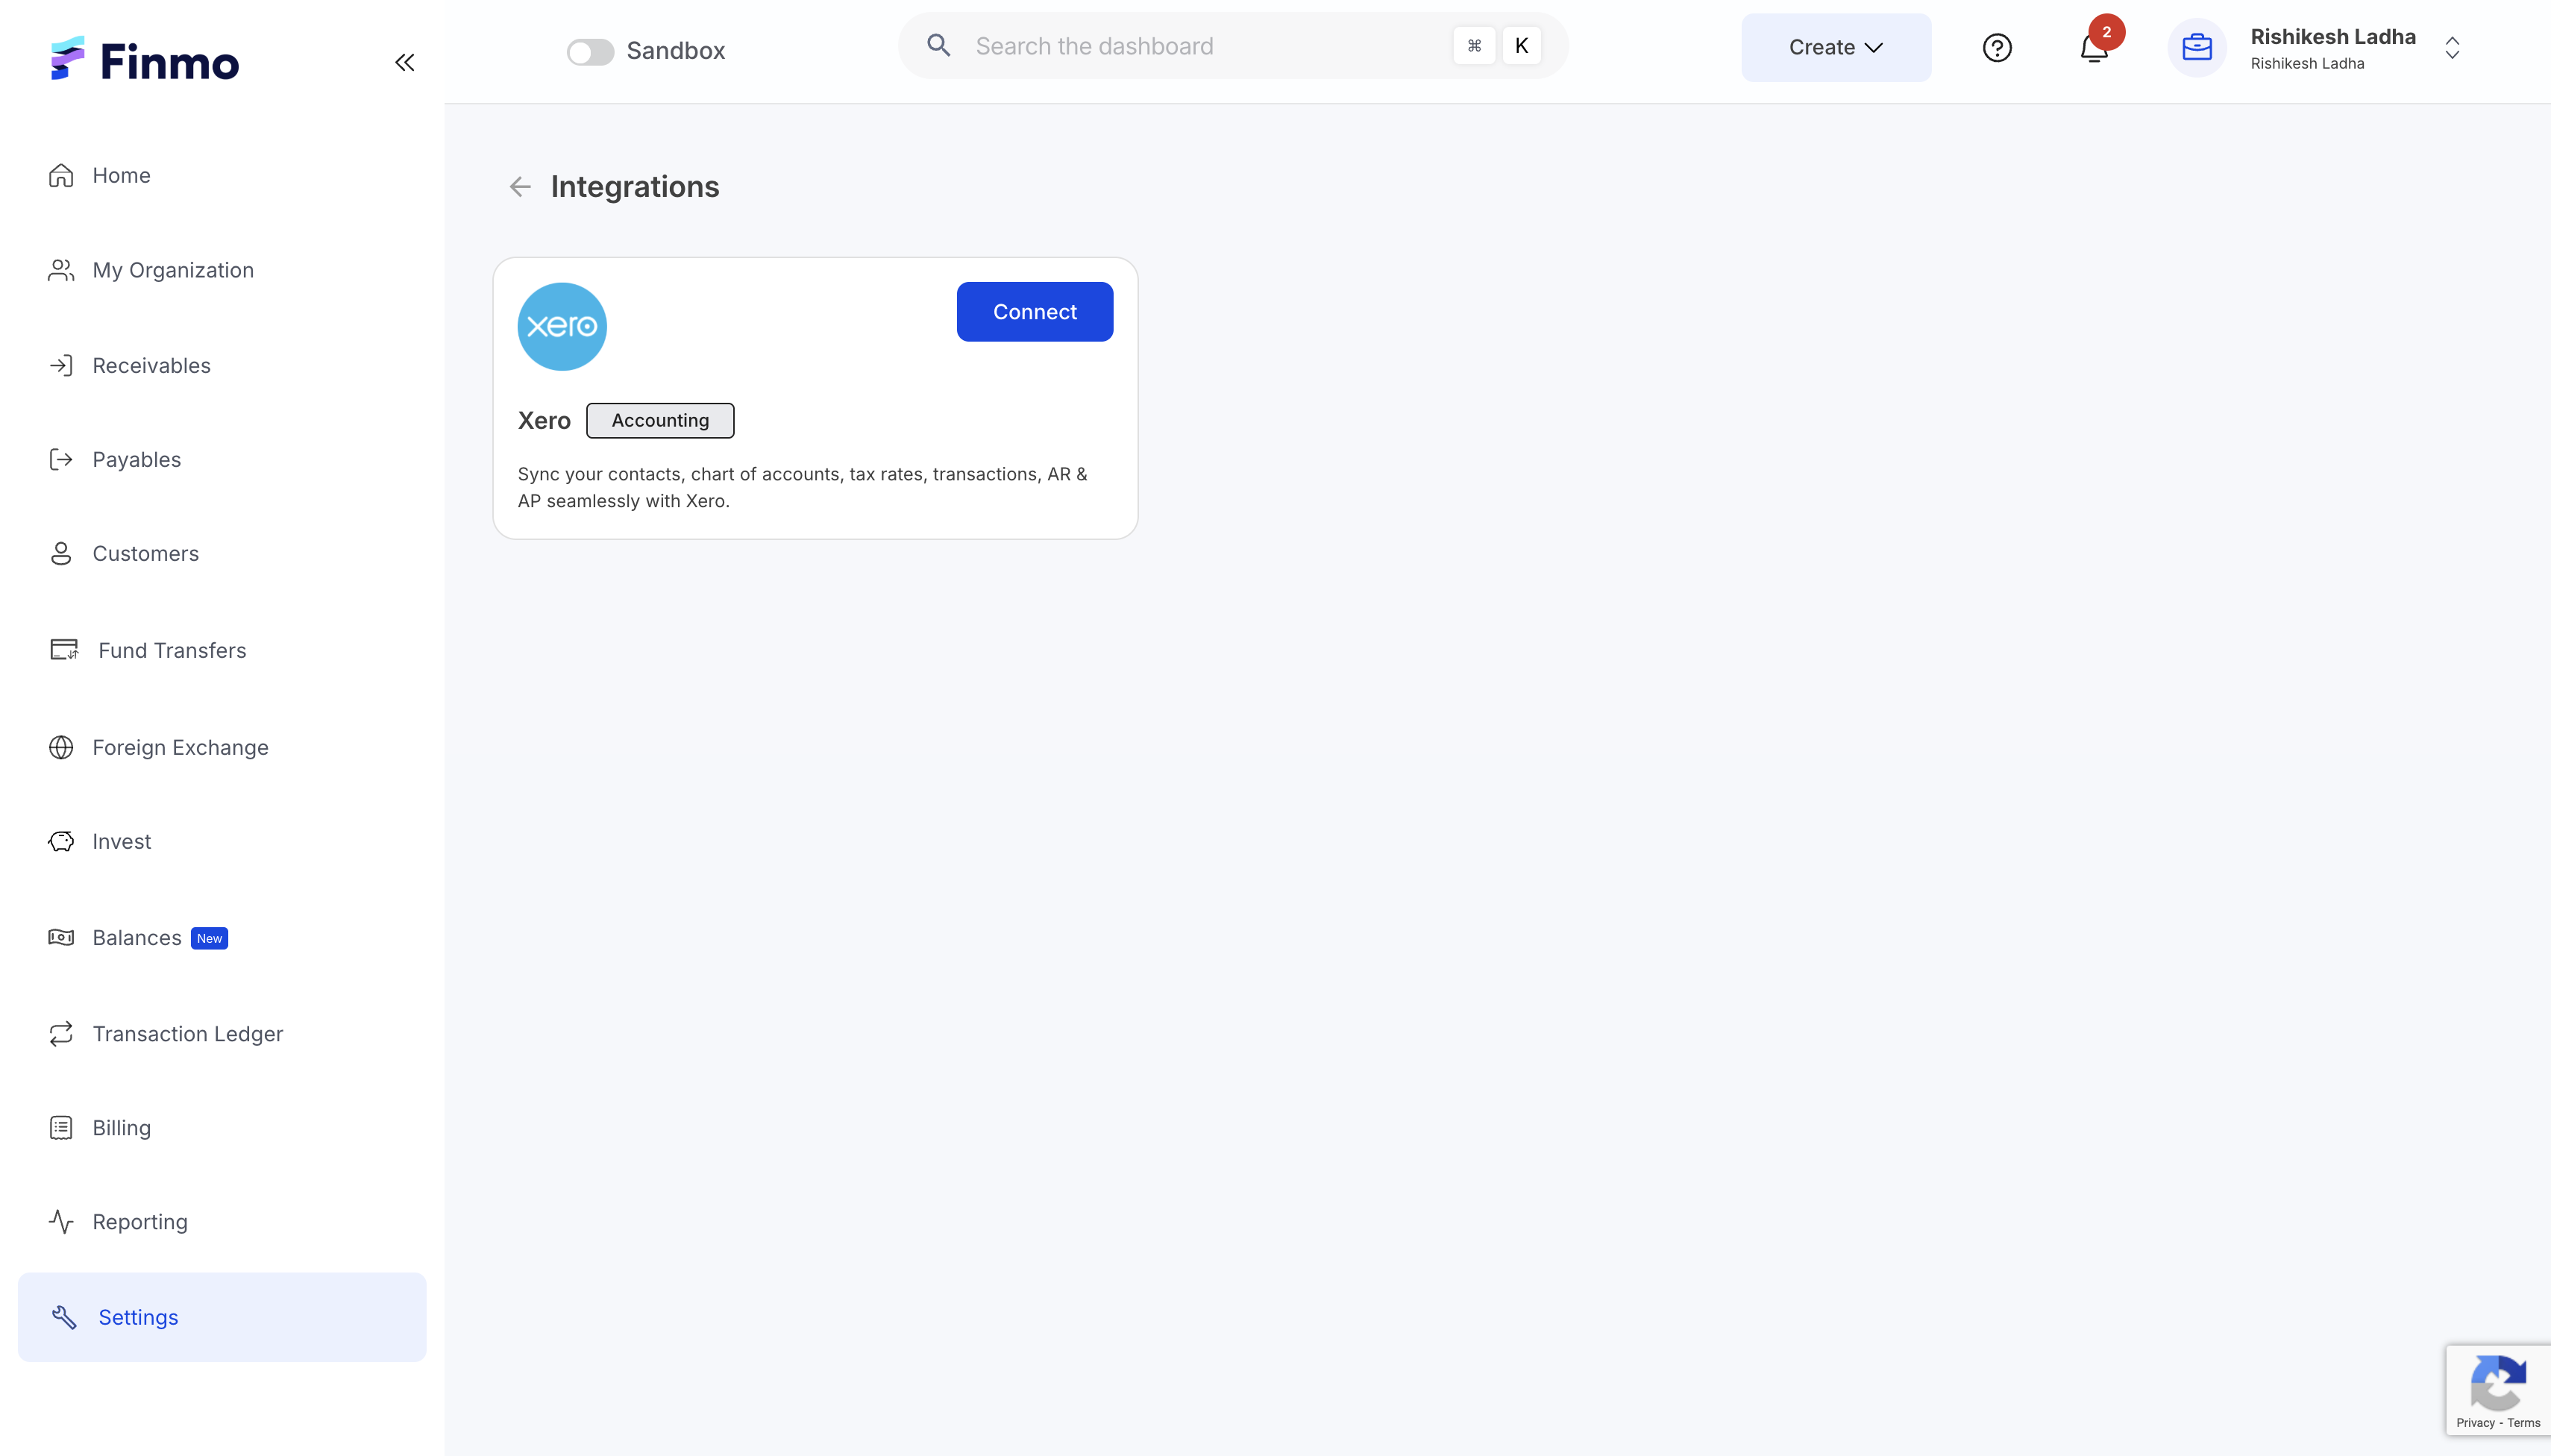
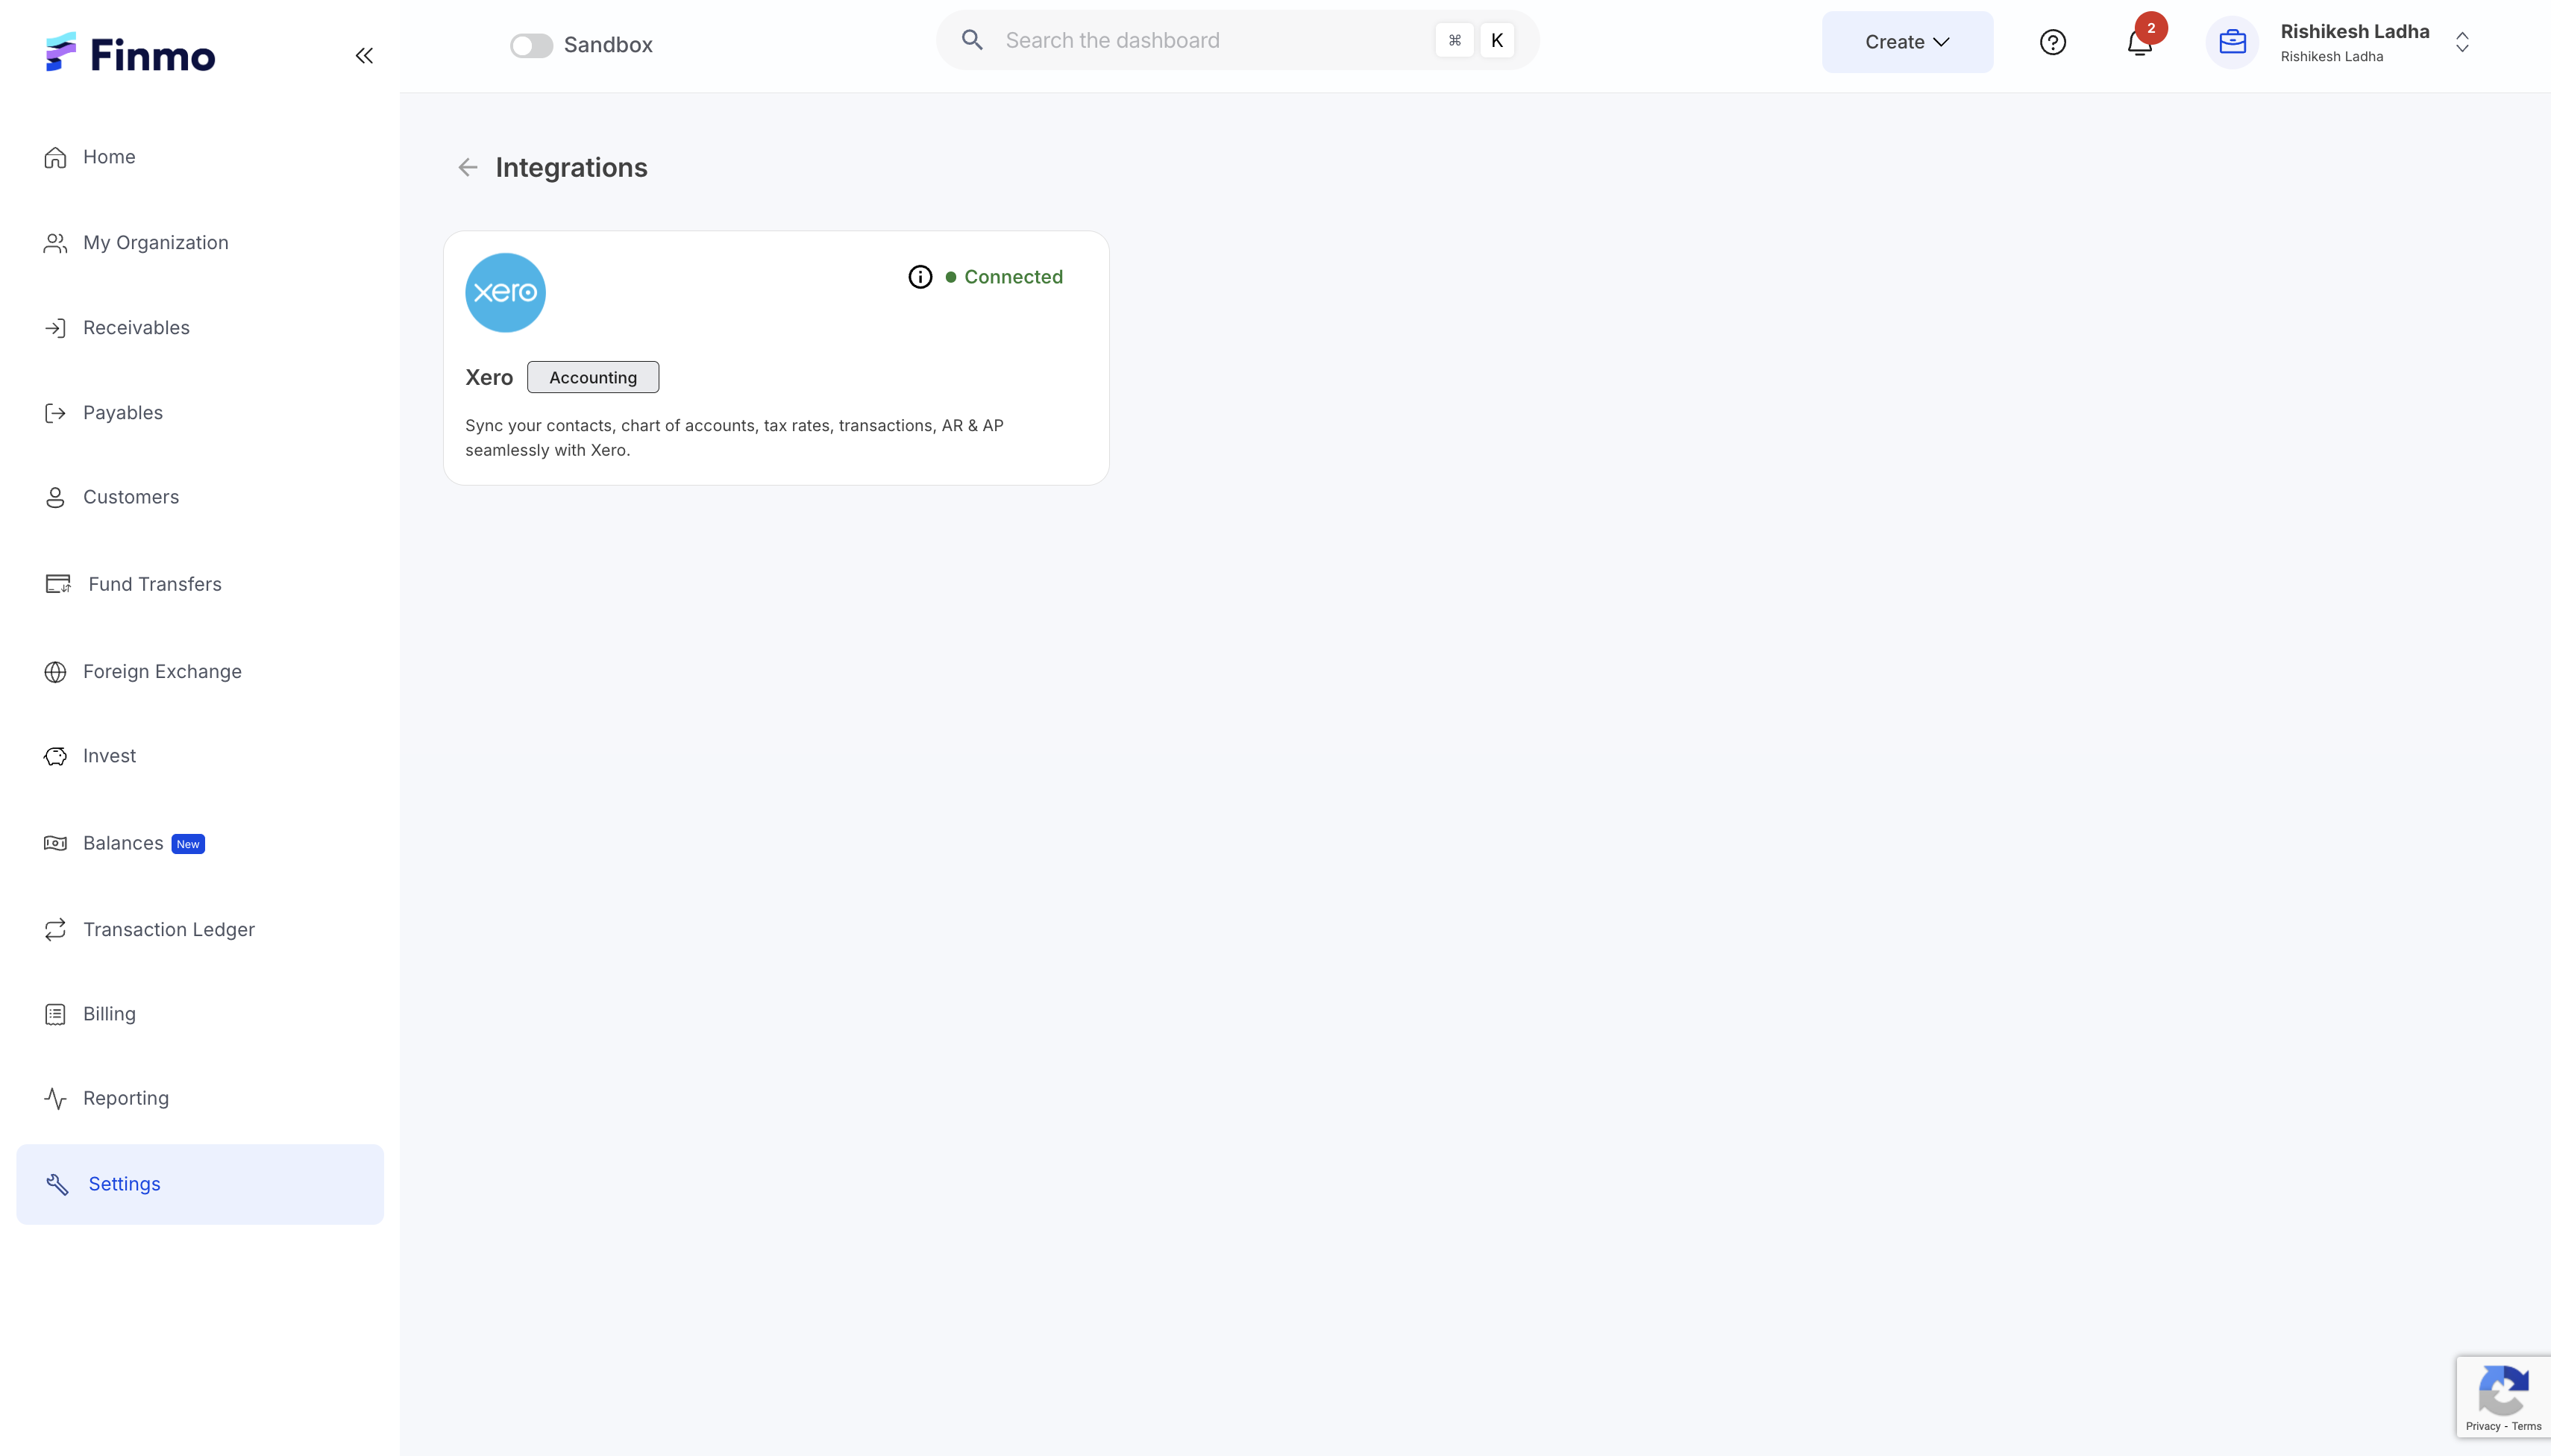
- Click Connect on the Xero card to be redirected to your Xero account for authorization. Once you grant access, a secure connection will be established between your Finmo and Xero accounts.

Transaction Sync
Before pushing transactions from Finmo to Xero, certain prerequisites must be met. Xero requires transactions to be associated with a specific bank account. Therefore, it is recommended to create separate bank accounts in Xero for Finmo transactions - for example, Finmo AUD or Finmo SGD.
Please note that Xero supports only one currency per bank account, so multiple bank accounts will be required if you need to push transactions in different currencies.
Steps to Sync Transactions
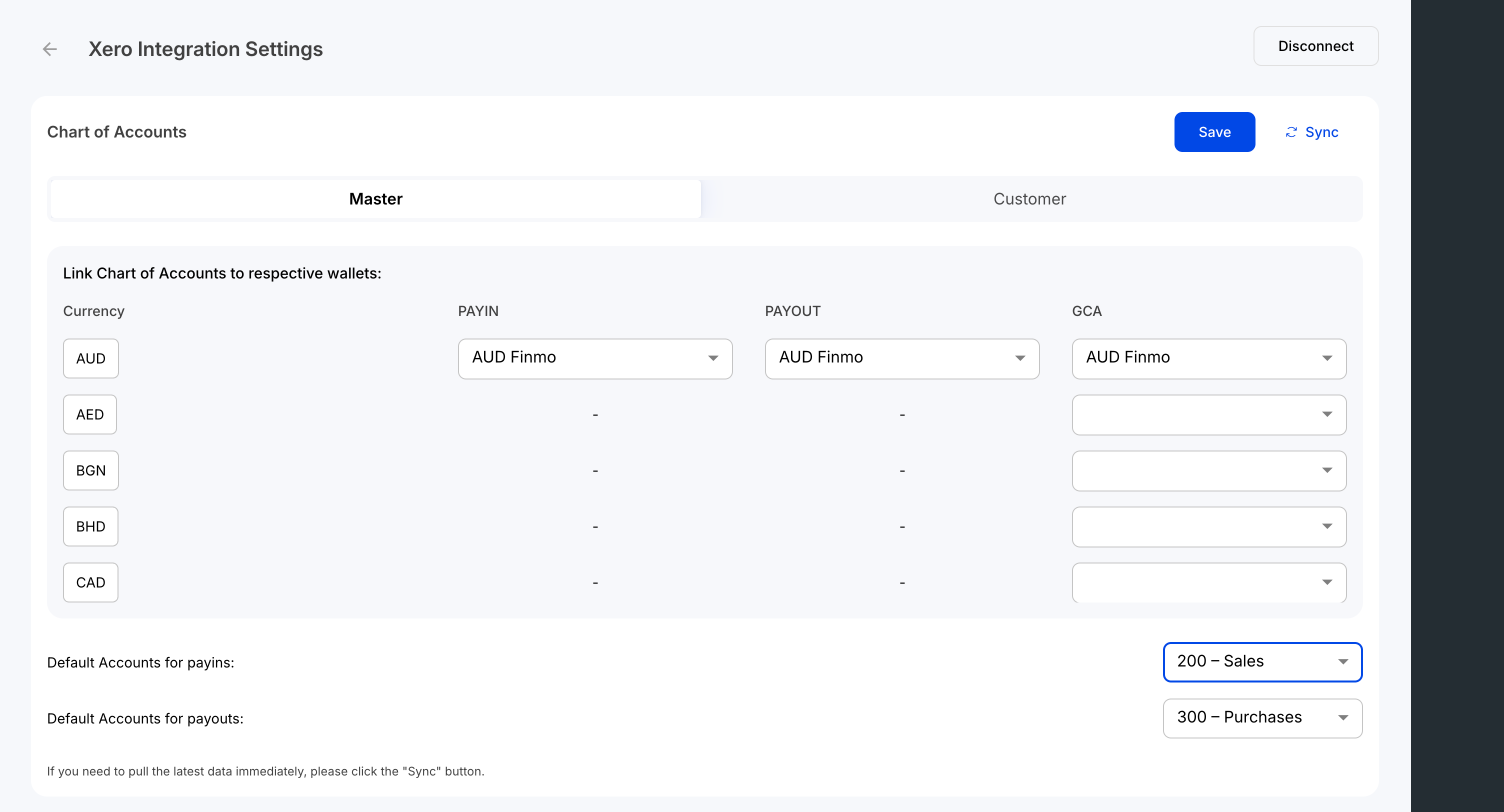
After establishing the connection, click on the Xero card to open the Xero Configuration page.
- Choose whether you want to configure Master Wallets (Payin, Payout, GCA) or Customer Wallets (General, GCA).
- For each selected wallet, specify which currency transactions should be linked to which Xero bank account.
- You should set a default account for Payins and a default account for Payouts. This ensures that transaction reconciliation is accurate and seamless.
- In Xero, it is important to assign a Chart of Accounts to each transaction type - either Inflow (Payin) or Outflow (Payout). While transactions are posted to their configured bank accounts in Xero, the associated Payin and Payout amounts will update the ledger according to the Chart of Accounts configured on the Xero configuration page.
- The Chart of Accounts displayed are those imported from Xero. Click Sync to update any recent changes from Xero. After applying your configuration, it is important to save to ensure the changes take effect.
- Before pushing transactions to Xero, ensure that Customers and Beneficiaries from Finmo are synced to Xero. In Xero, Customers and Beneficiaries are referred to as Contacts.
- Once synced, they will appear in Xero under All Contacts.
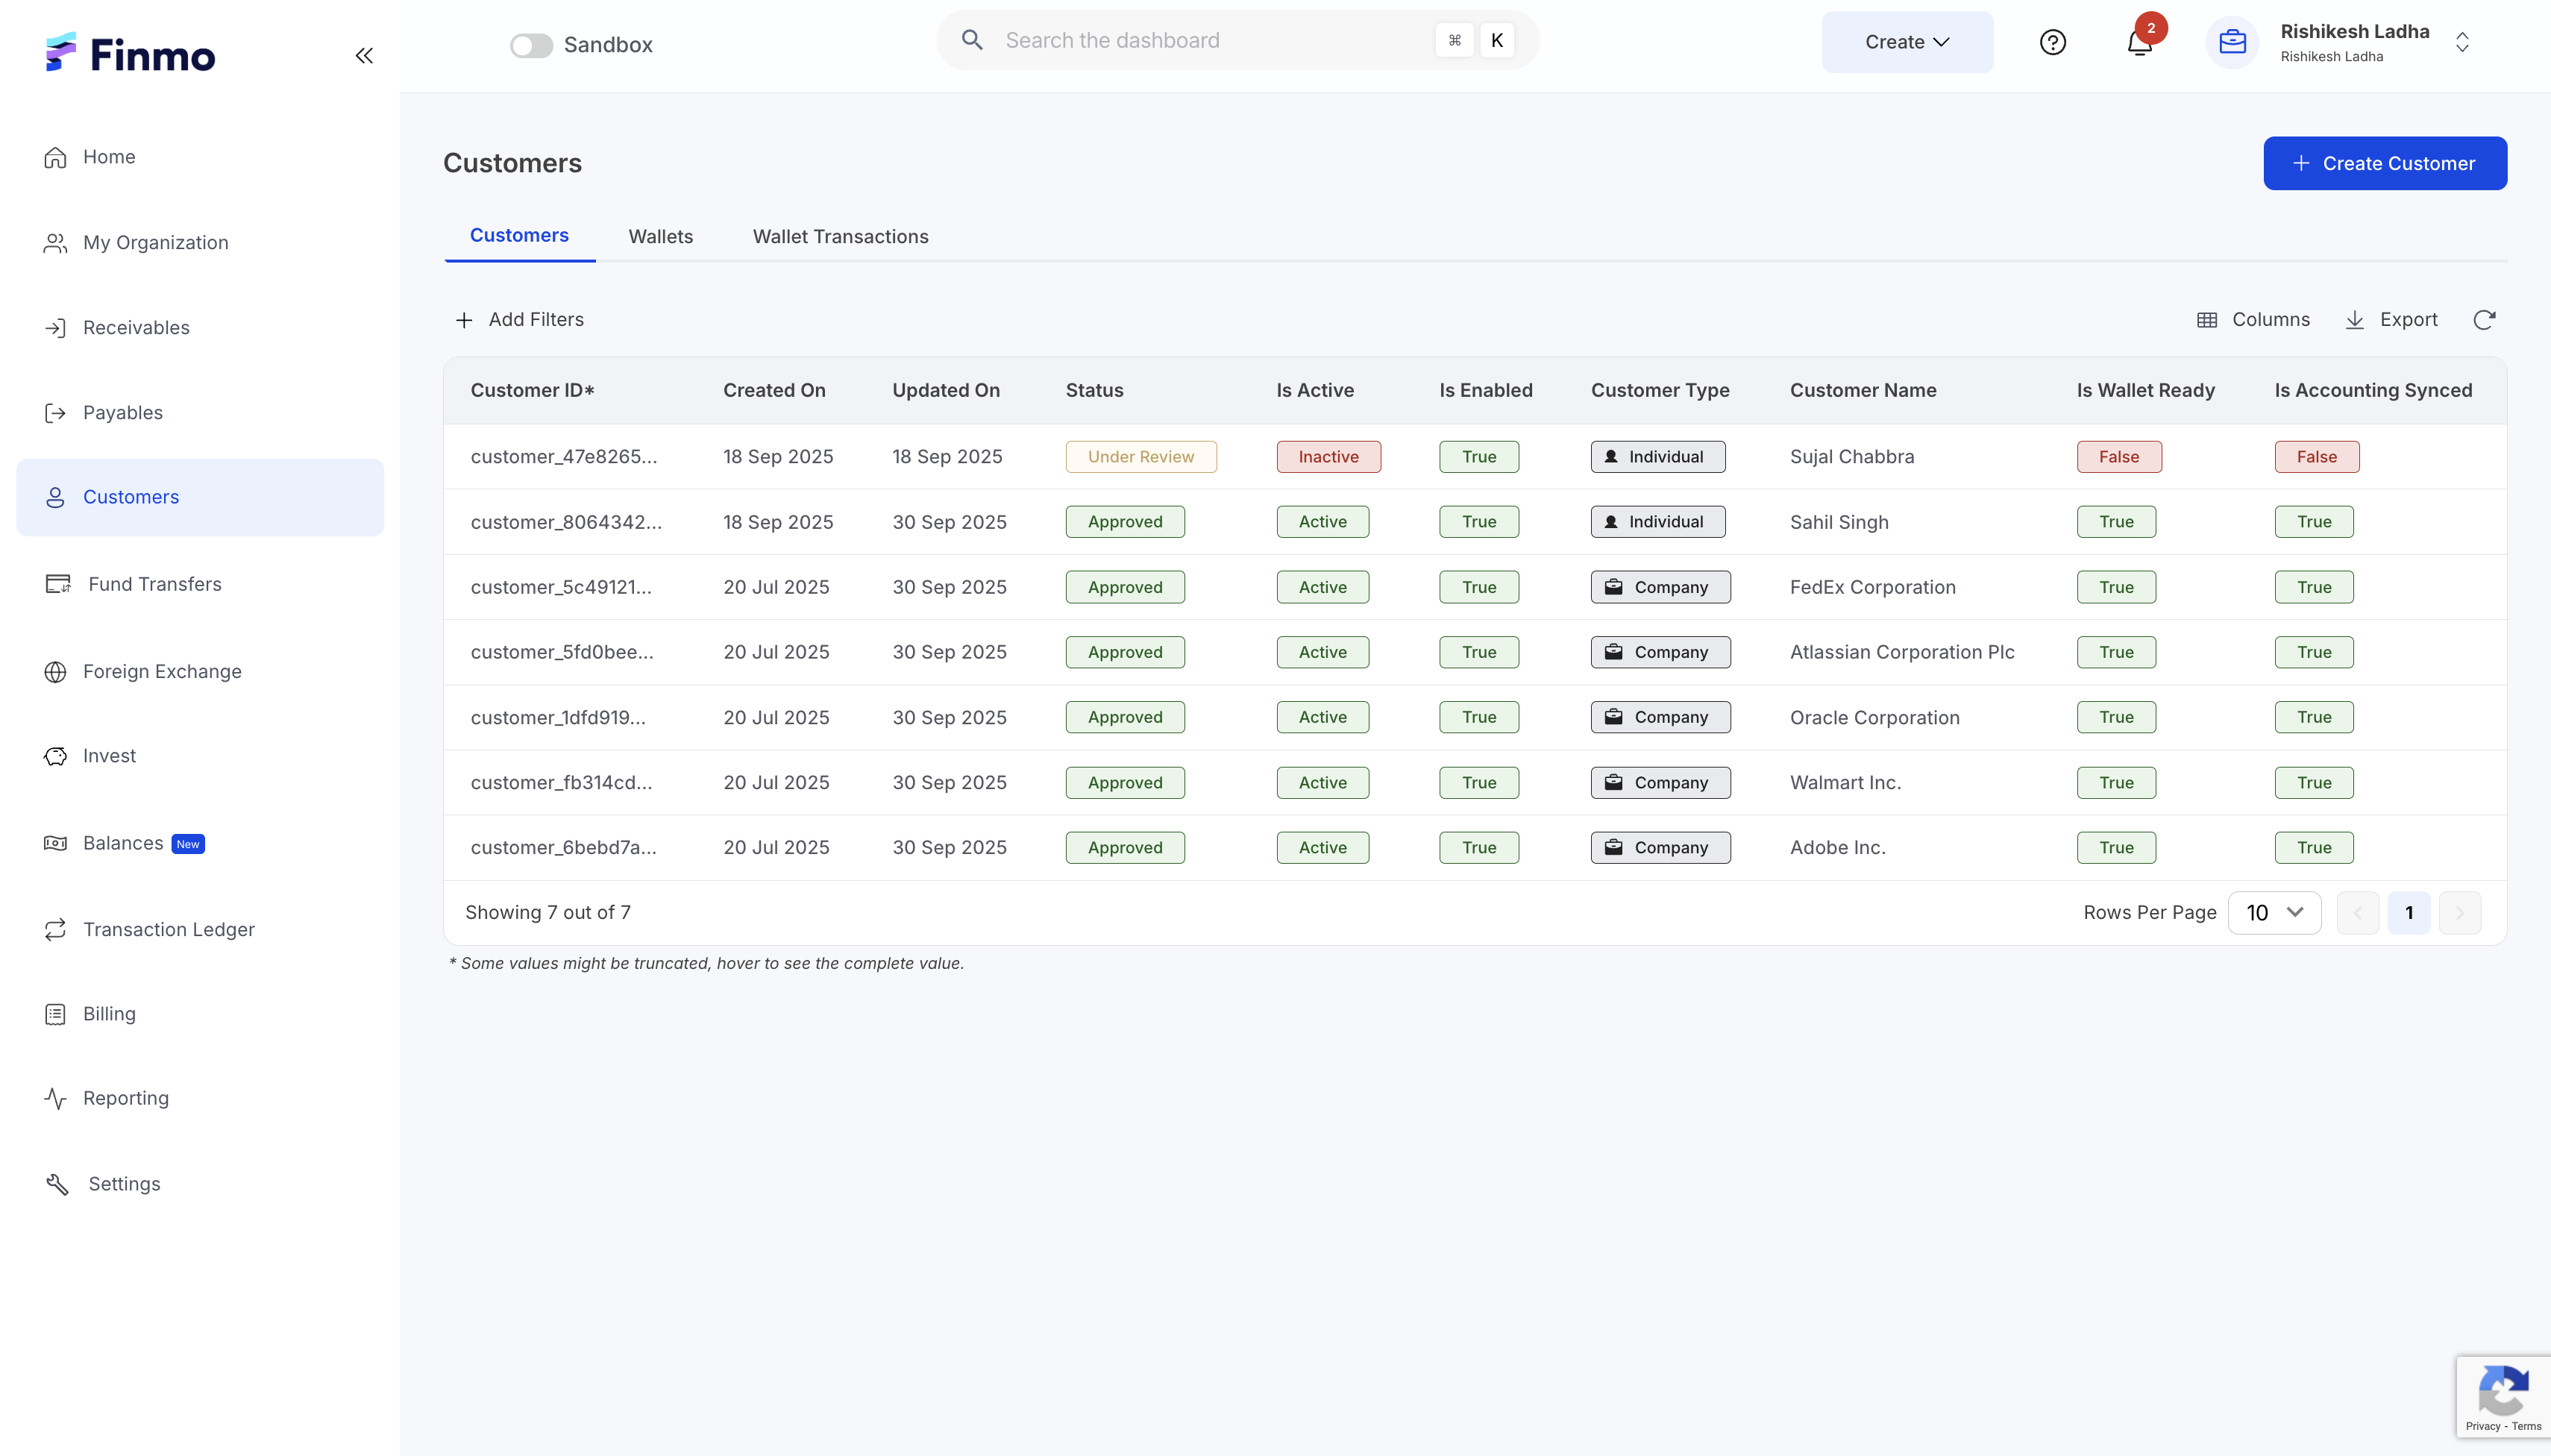
- In Finmo, the Accounting Synced column in the Customers and Beneficiaries tables will display Yes to indicate successful synchronization.
- In the Contacts section of the Xero Configuration page, you can choose how contacts are synced:
- Ad-hoc Sync: Manually push contacts to Xero whenever needed.
- Auto Sync: Automatically sync contacts to Xero on a weekly basis.
- Last Sync Timestamp: View the date and time of the most recent contacts sync.
This gives you flexibility to keep your Xero contacts up to date according to your preferred workflow.

- Once the contacts have been synced, you can begin syncing your transactions.
- Starting State: When syncing transactions for the first time, select the correct start date, which determines when Finmo will sync transactions to Xero. This action is irreversible, so ensure the date is accurate.
- Sync Options:
- Auto Sync: Automatically sync transactions daily.
- Ad-hoc Sync: Manually push transactions whenever needed.
- Last Sync Timestamp: The Transactions card displays the date and time of the most recent sync.
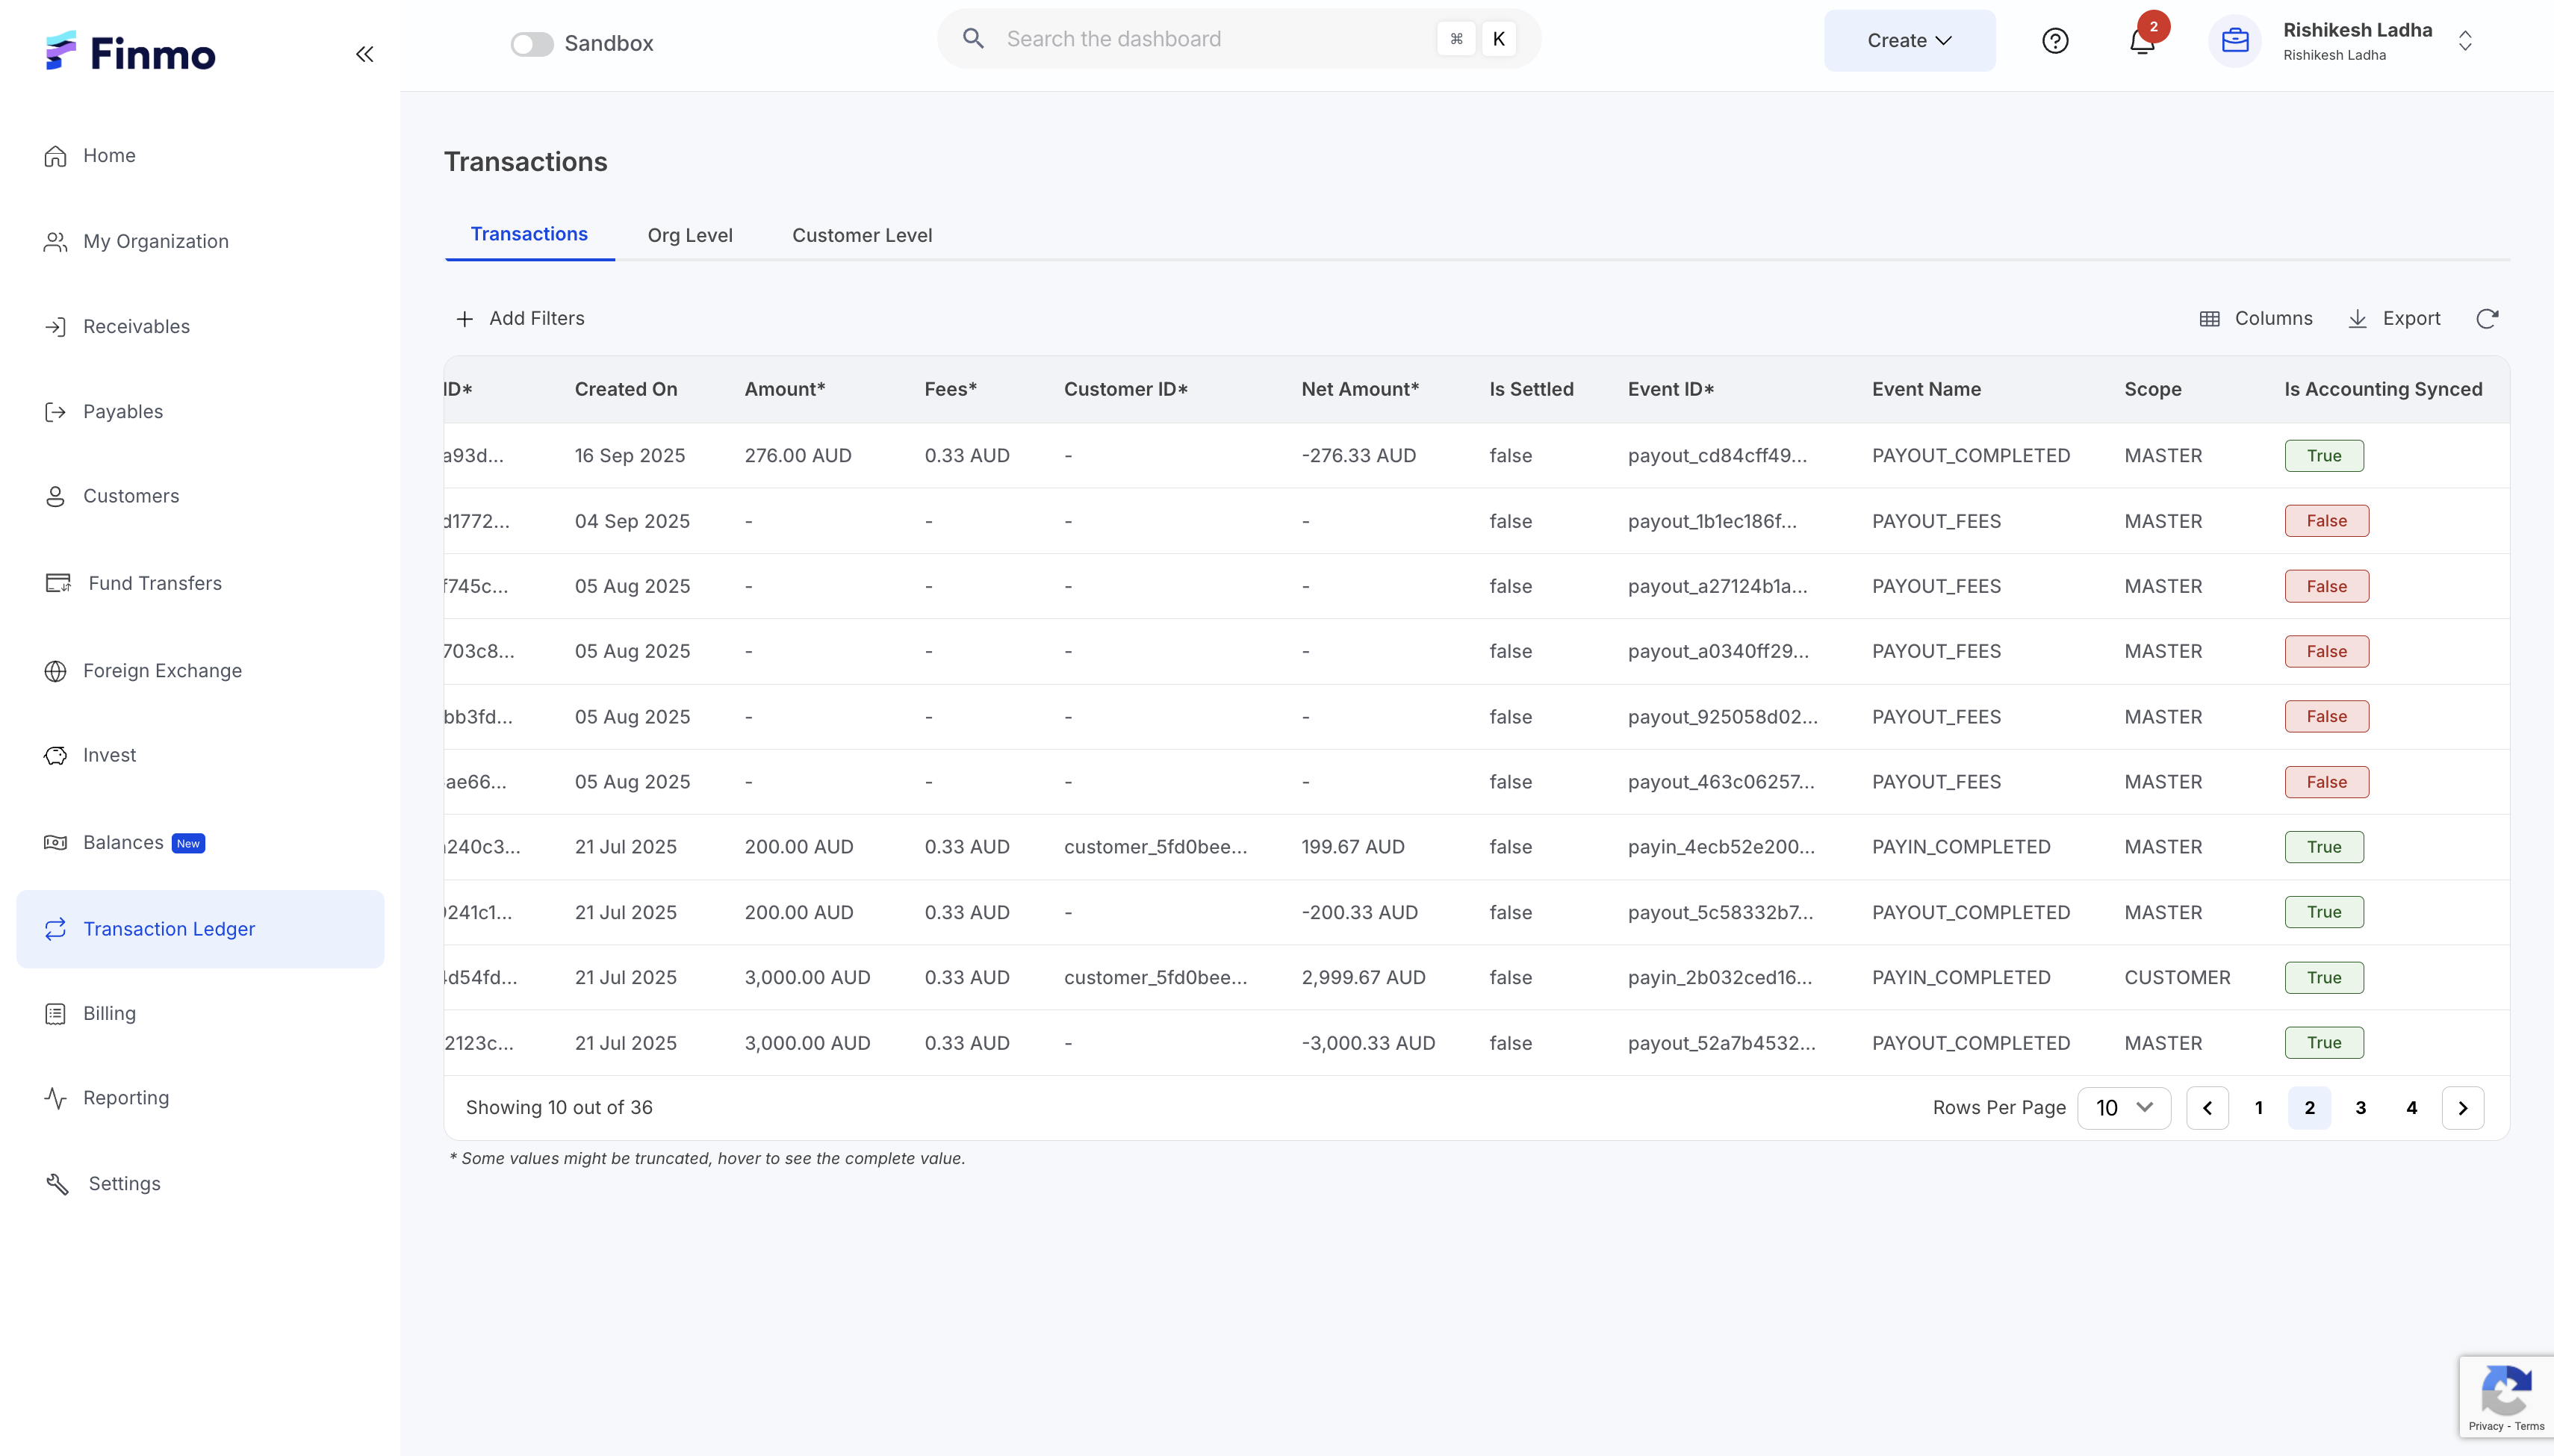
Confirmation: After transactions are successfully synced, the Account Synced column in the Transactions table will show Yes.
Once transactions are pushed, you can verify them in your Xero account. Based on your configuration, transactions in each currency will appear in their respective bank accounts in Xero.

The transaction syncing from Finmo to Xero is separate from Bank Feeds. This sync pushes transactions from Finmo into the bank accounts you have created in Xero.
For Bank Feeds, you can currently download the Accounting/ERP Transaction Statement from the Reporting module in the Finmo Dashboard and upload it to Xero. All transactions from that report will then appear in the Bank Statements section in Xero, enabling reconciliation.
AR & AP Sync
Similar to transaction syncing, there are a few prerequisites that must be completed before pushing Accounts Receivable (AR) and Accounts Payable (AP) from Finmo to Xero.
Steps to Push AR & AP to Xero
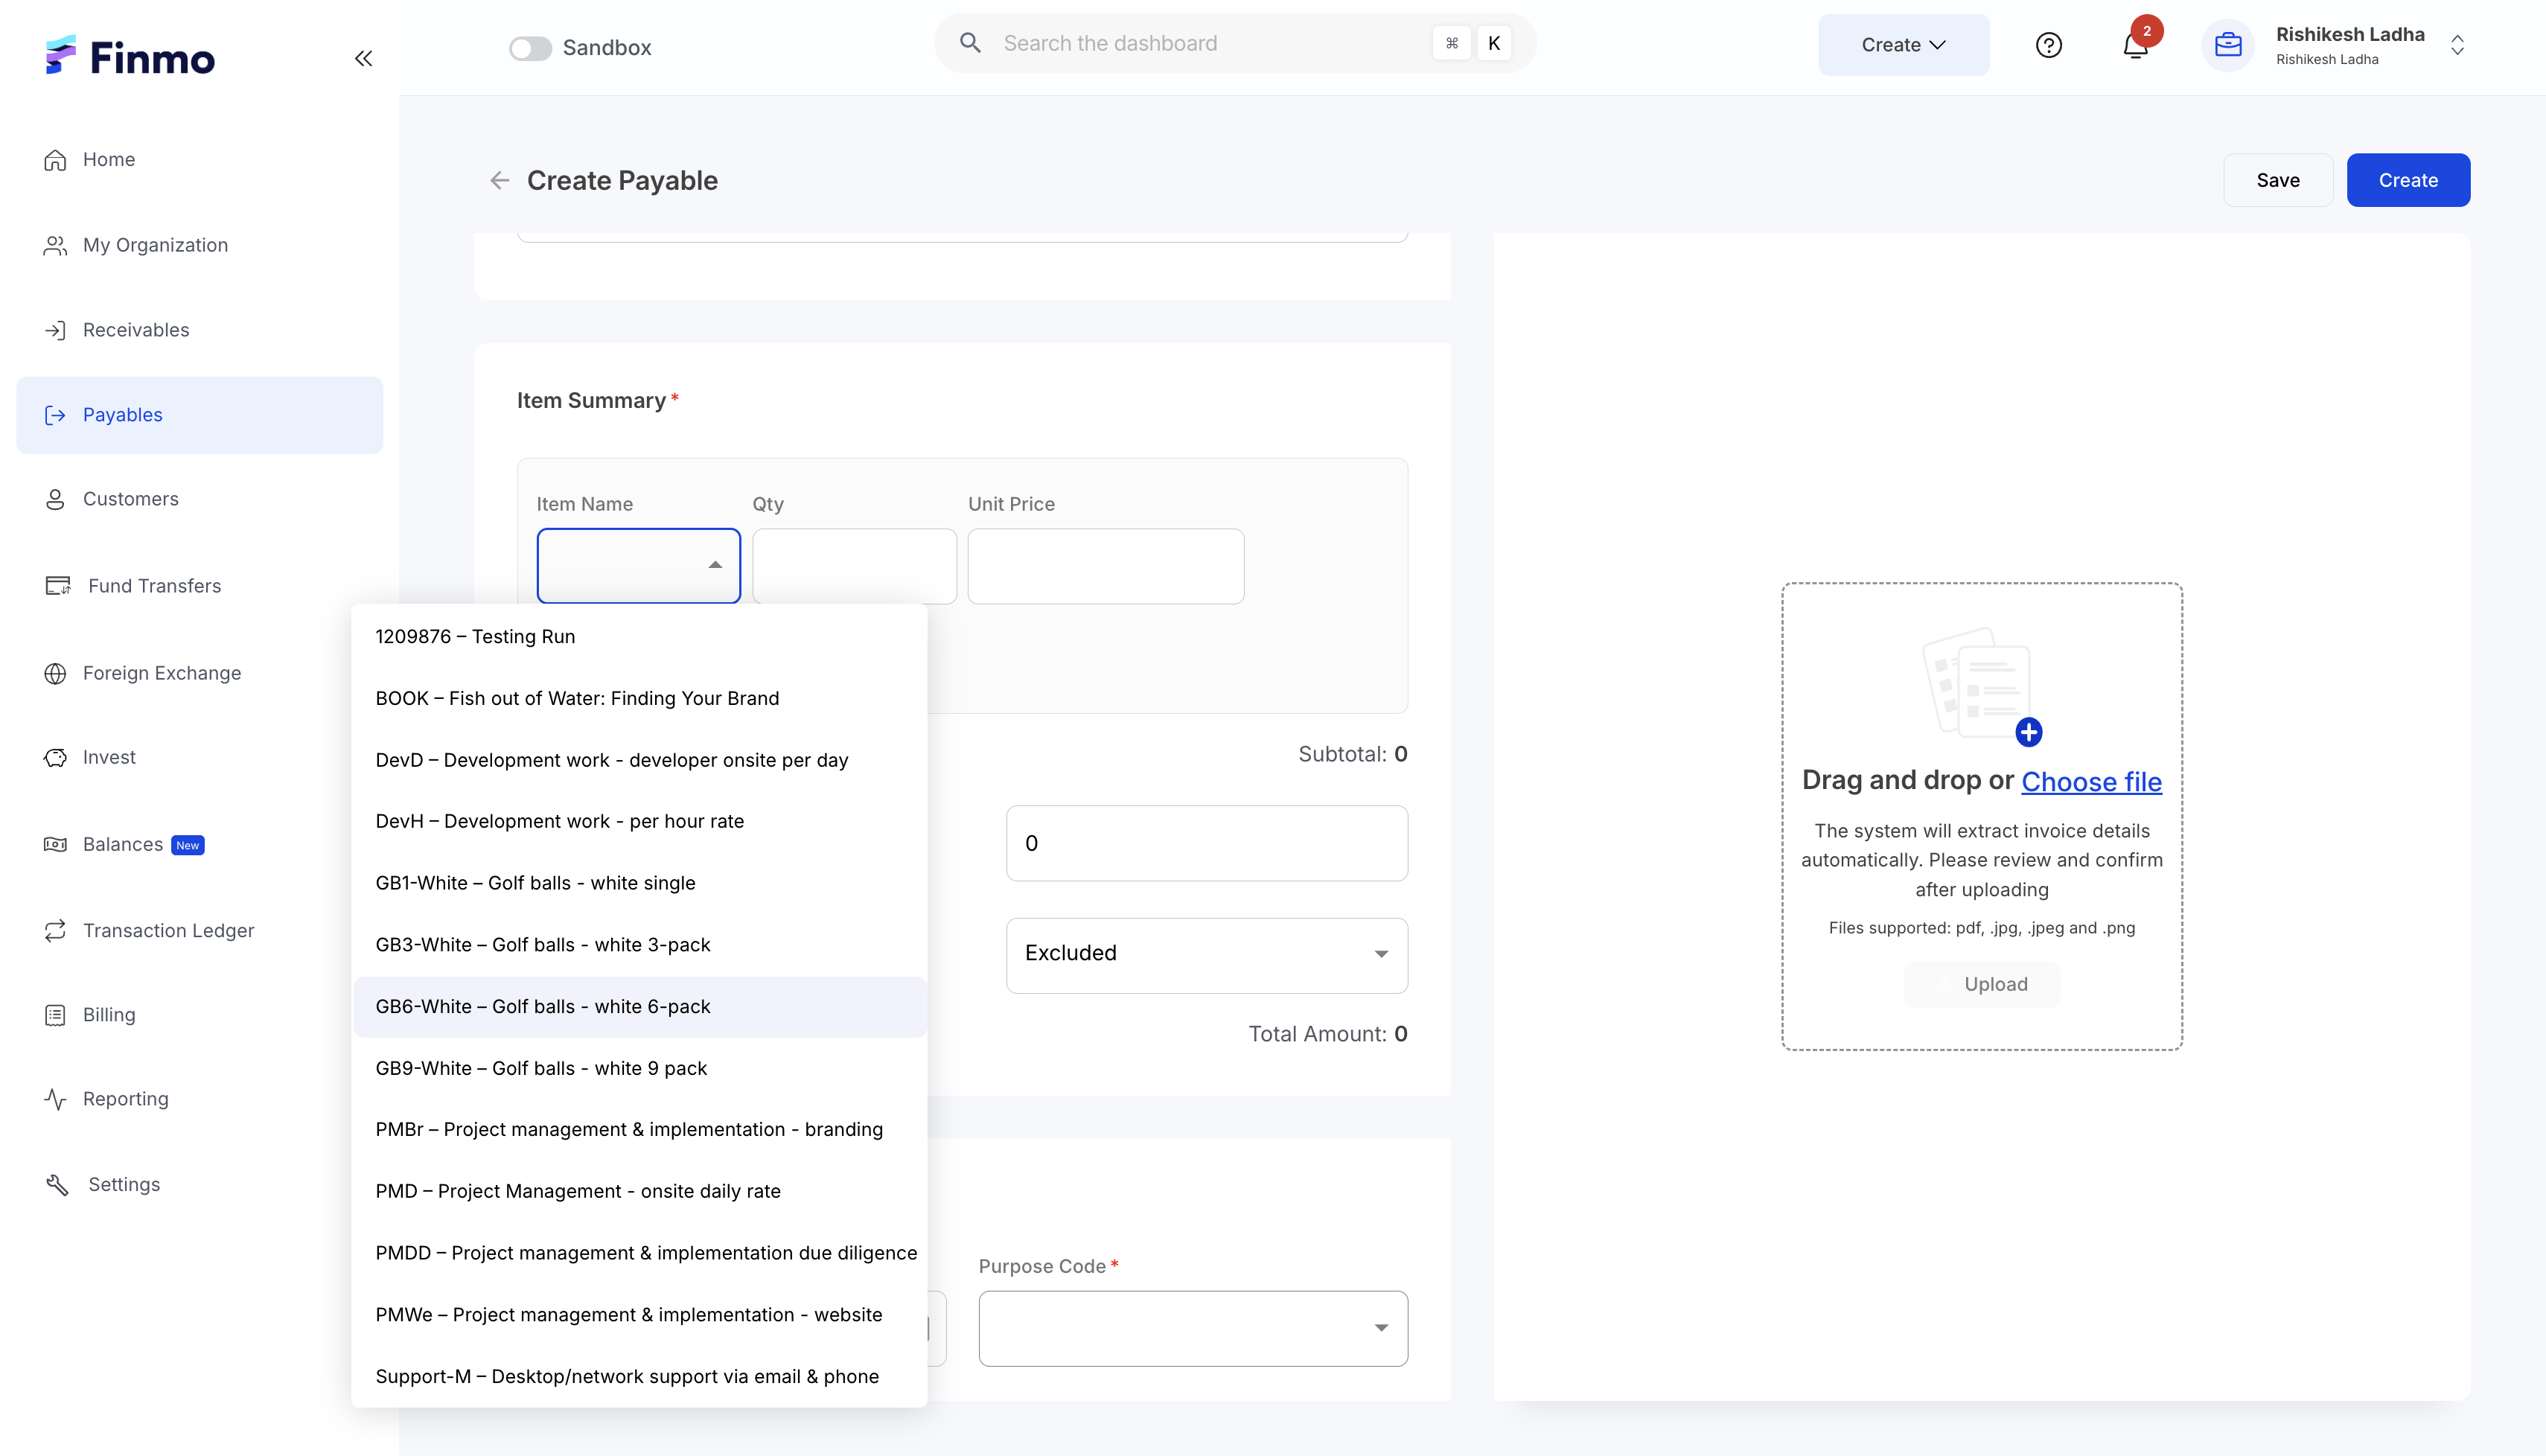
- Ensure that all Customers and Beneficiaries are synced to Xero.
- Any invoice or payable being pushed from Finmo must be associated with a customer or beneficiary that already exists in Xero.
- This ensures that the corresponding AR or AP records are correctly reflected in Xero.
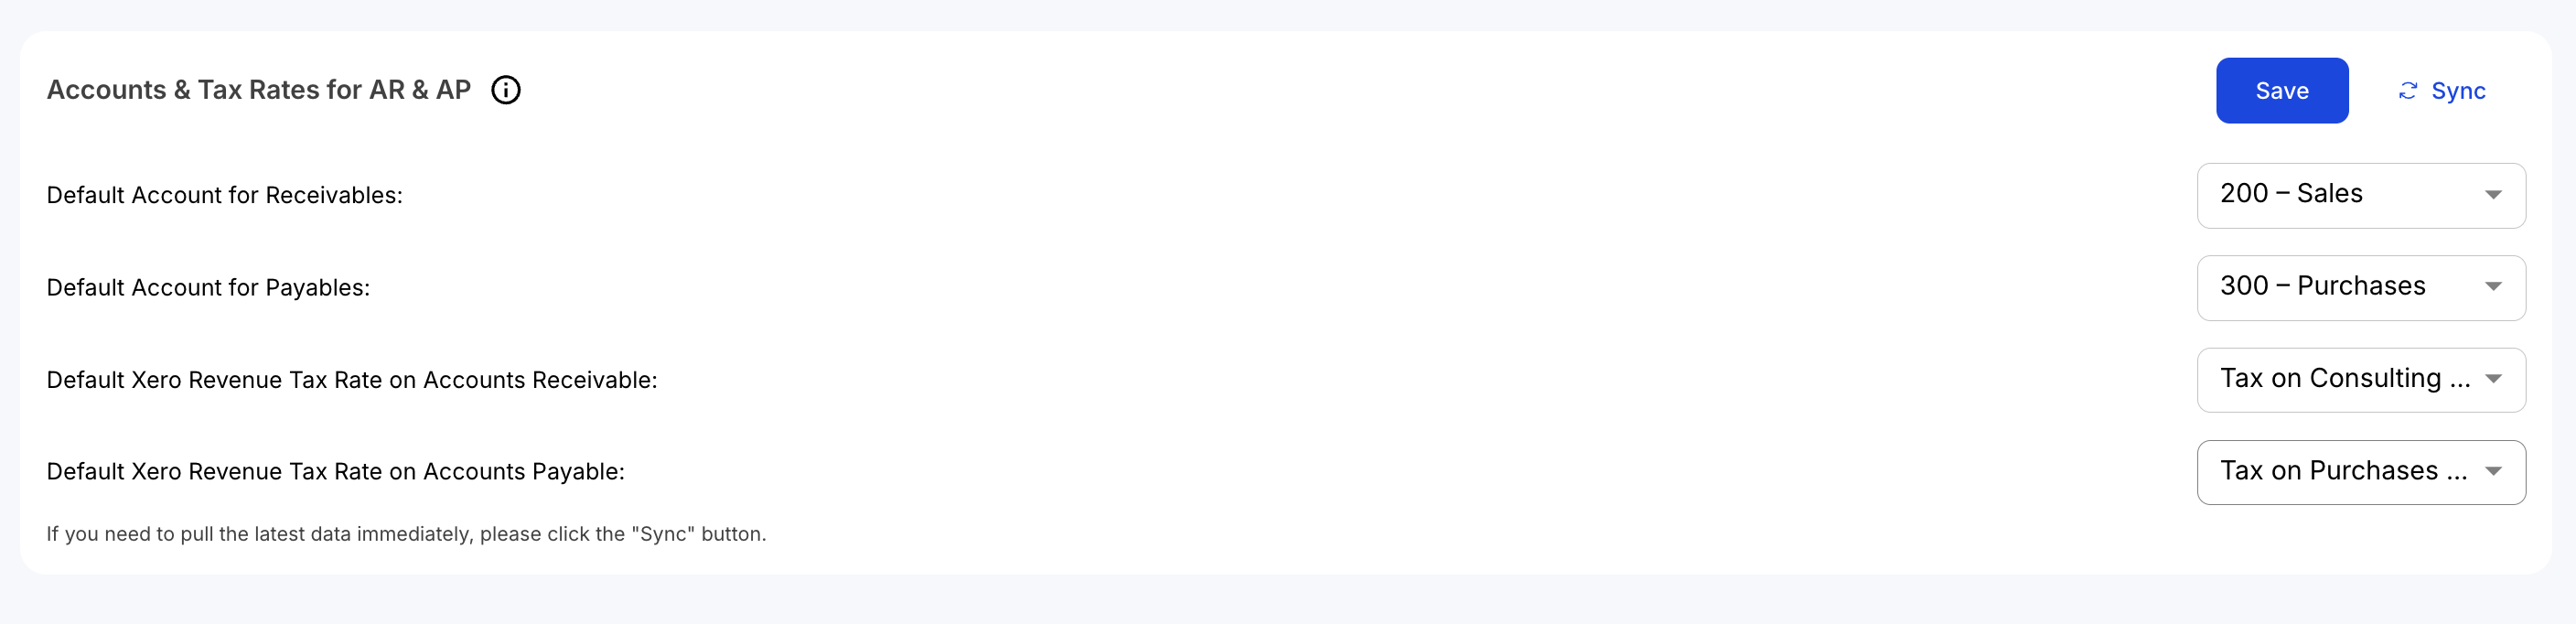
- After syncing contacts, scroll to the bottom of the Xero Configuration page to set up AR & AP configurations.
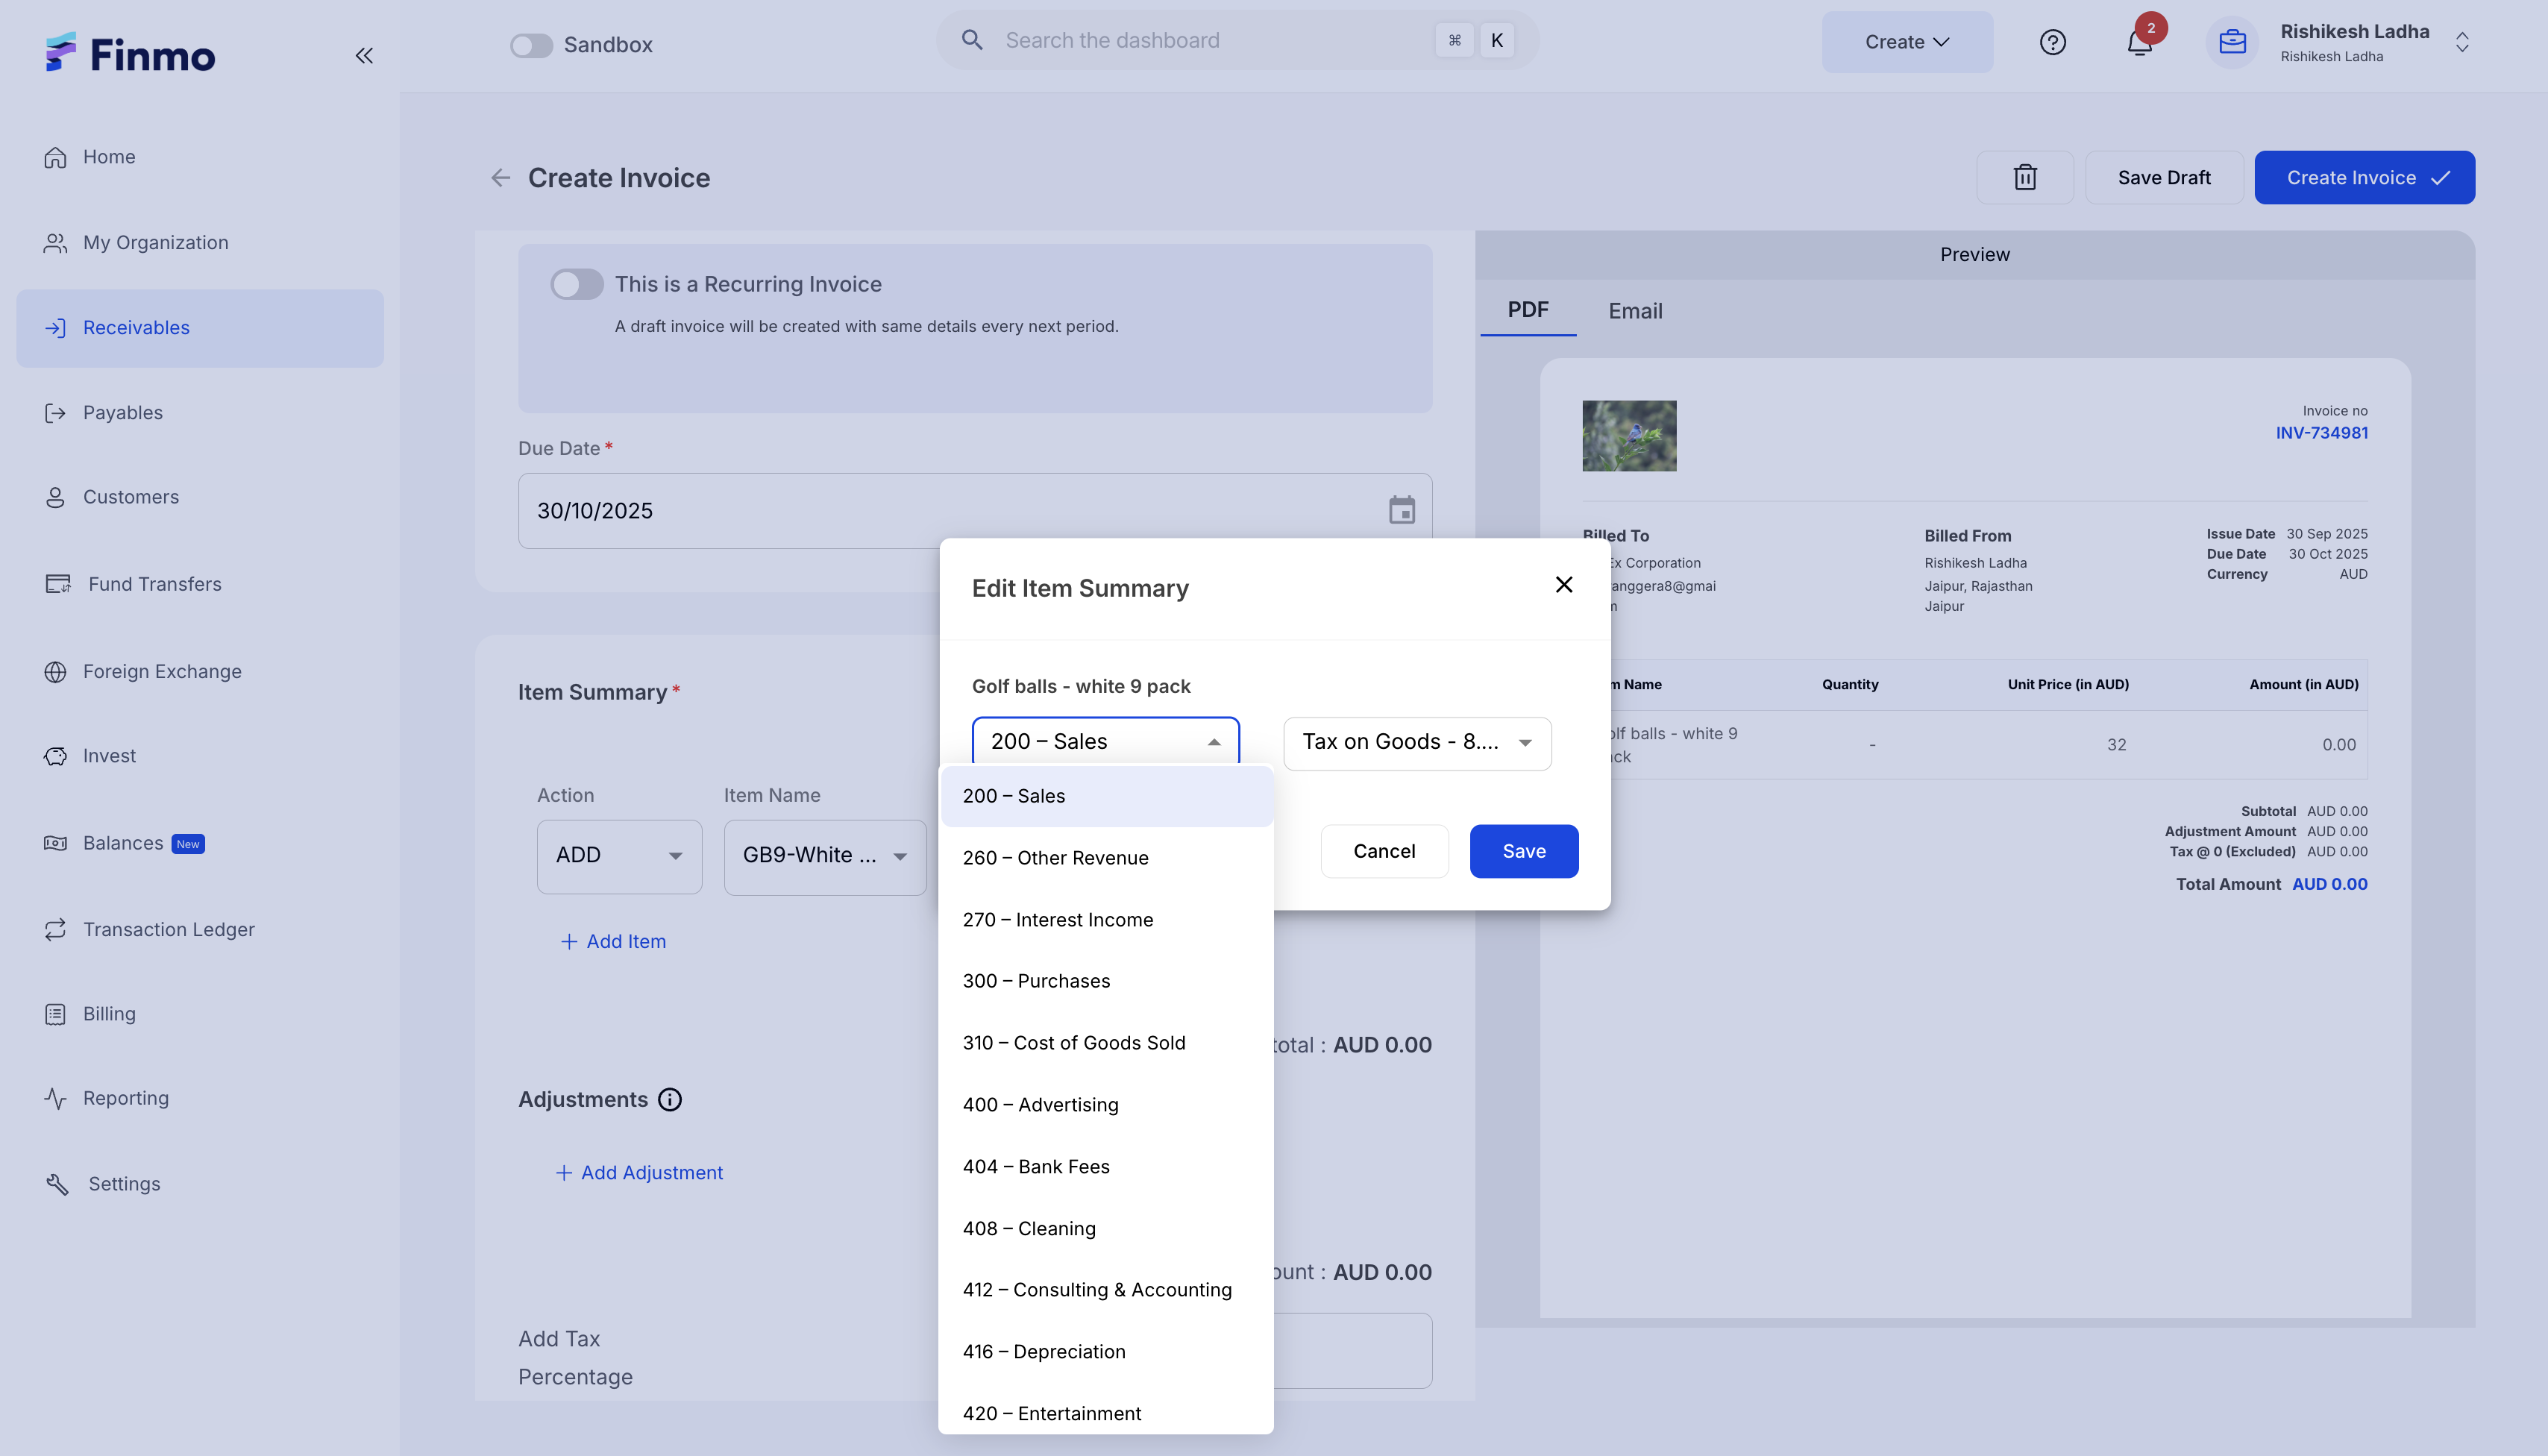
- In Xero, each line item in an Invoice (AR) or Bill (AP) must have an assigned Chart of Accounts and Tax Rate. To simplify this process, you can define the default Chart of Accounts and Tax Rates for AR and AP in Finmo.
Based on these configurations, line items will be recorded in the designated ledgers in Xero. AR entries will appear under Invoices, and AP entries will appear under Bills.
Be sure to save your configuration after setup. You can also sync the latest Chart of Accounts and Tax Rates from Xero to Finmo at any time.
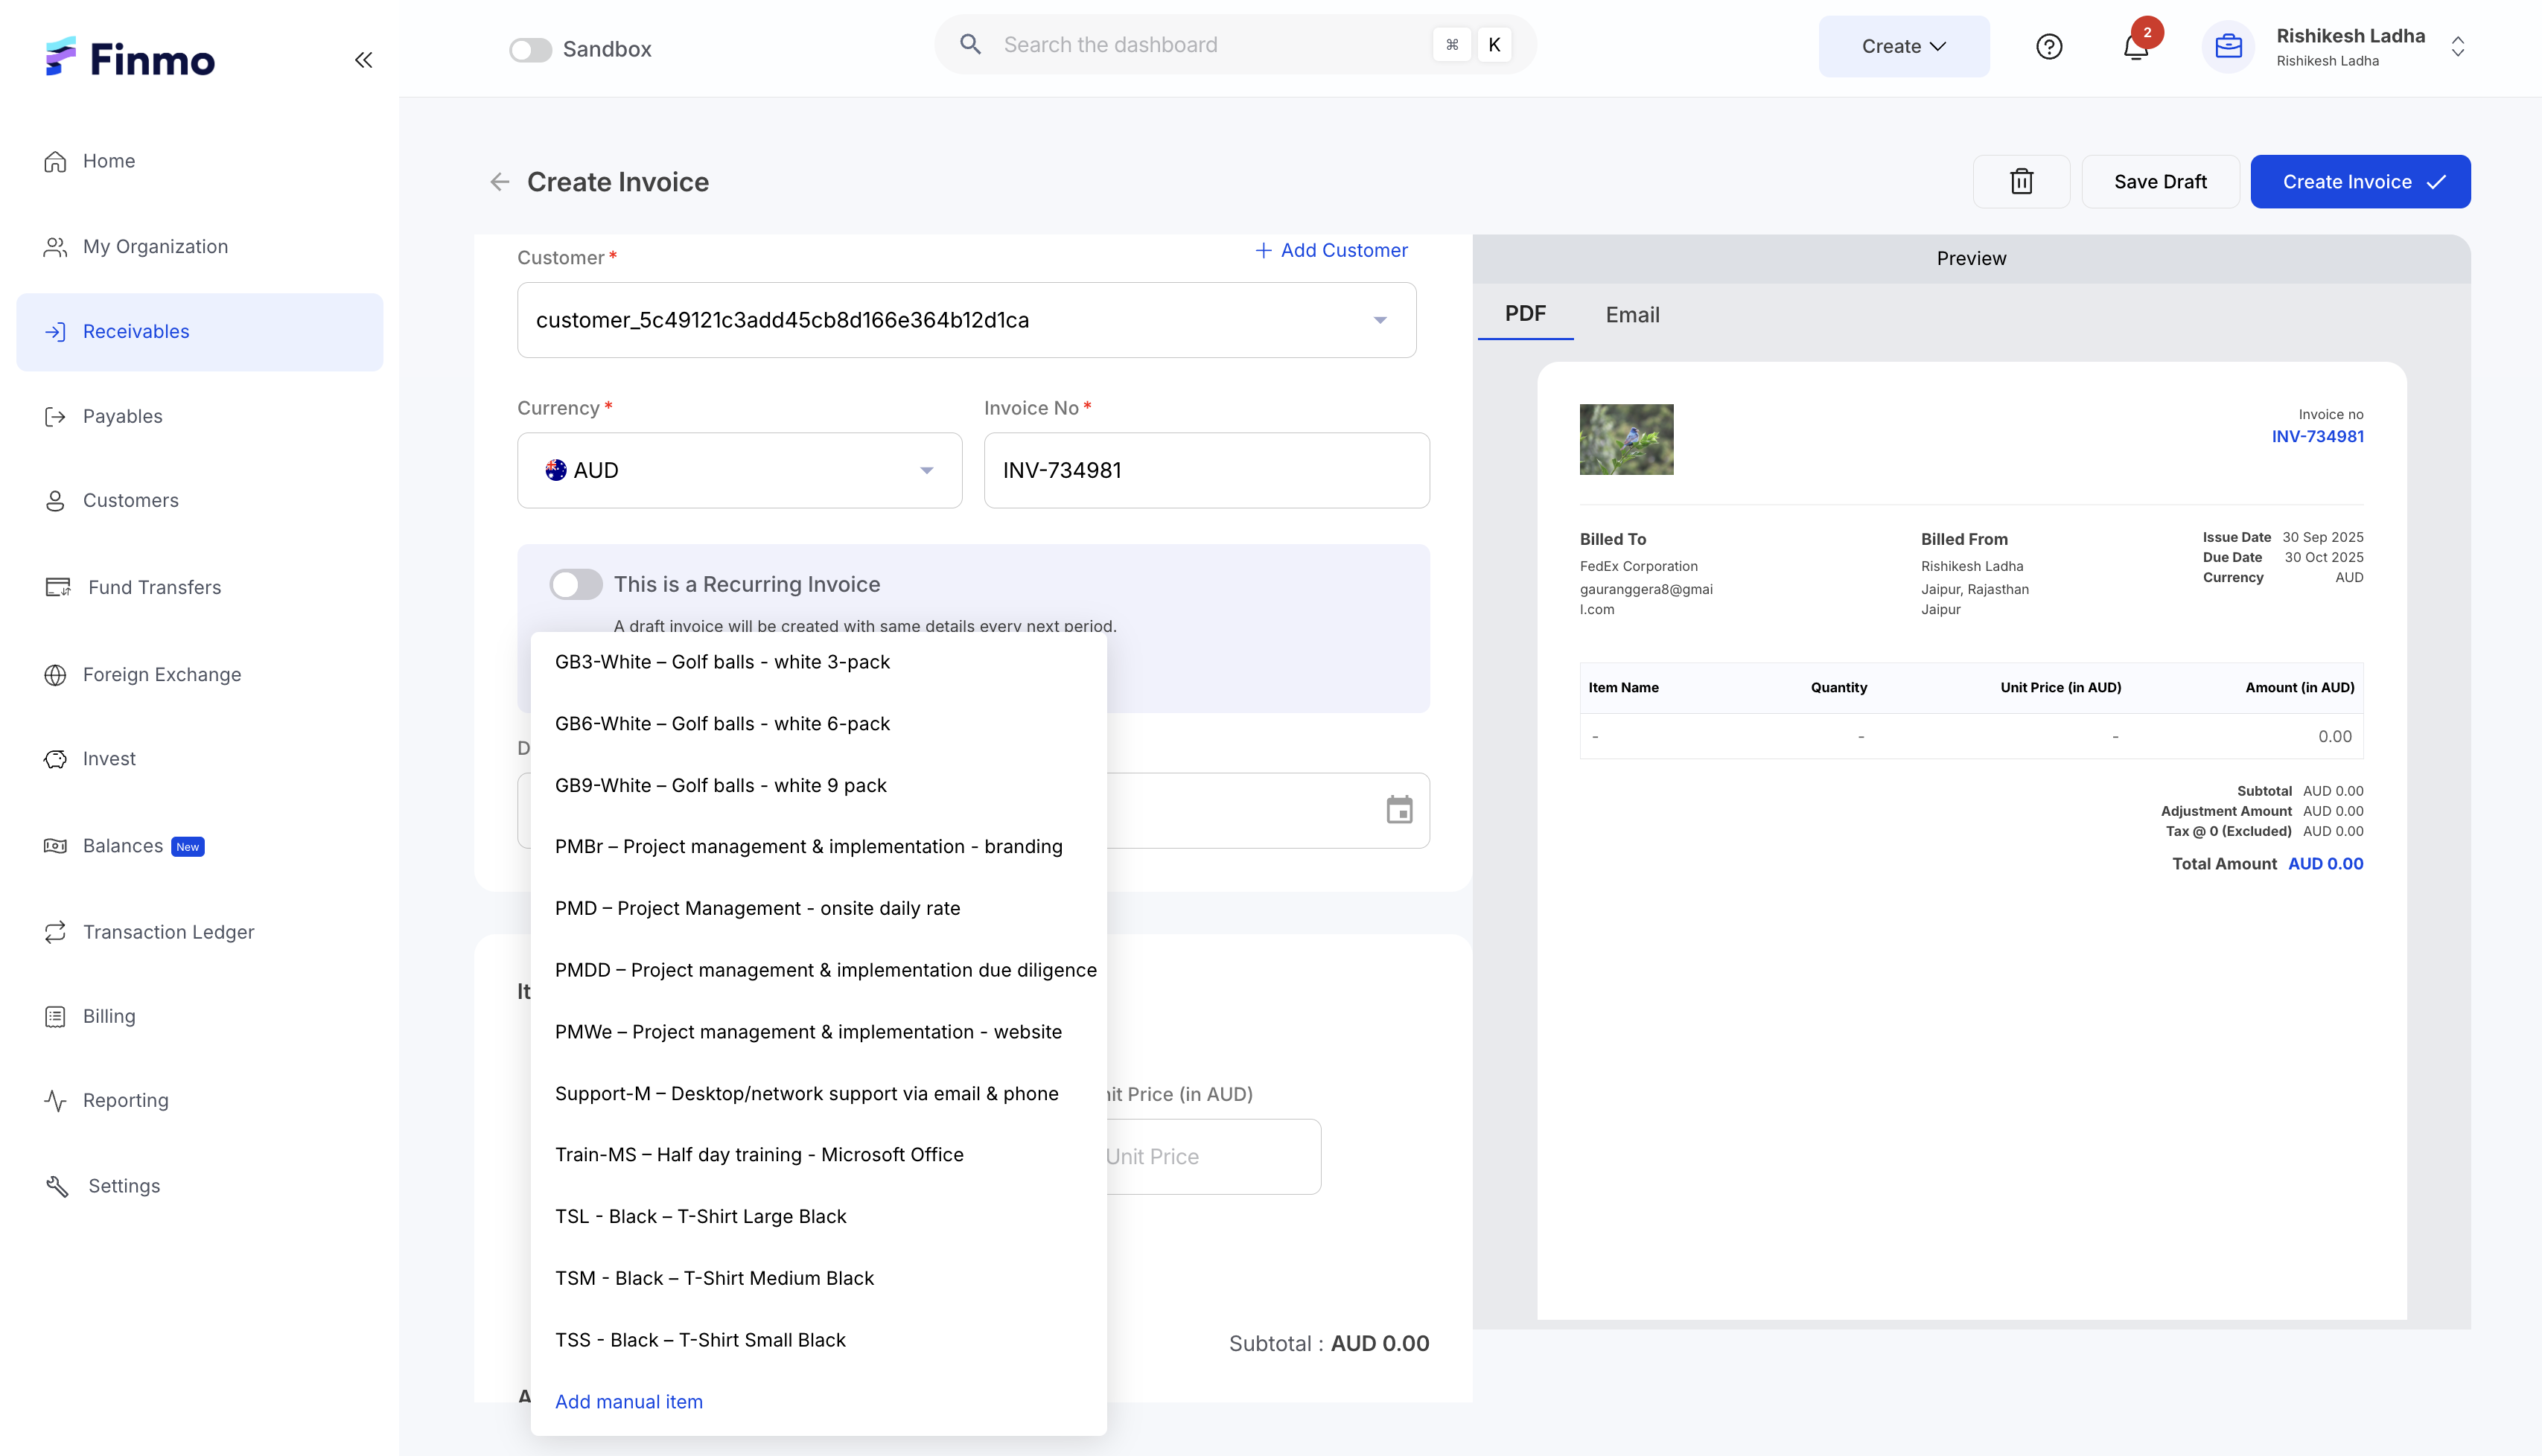
- After completing the configuration setup, you can proceed to create AR or AP entries from the Finmo Client Portal.
- In the AR and AP creation forms, the Items dropdown will display all items imported from your Xero account.
- When you select an item, the unit price will auto-populate if it has been defined in Xero.
- You can also add a custom item that is not part of the imported Xero list. Such items will appear as Description when pushed to Xero. Even though the default Chart of Accounts and Tax Rates are defined for AR and AP, you can override and edit them during the creation process.
- Once an AR or AP entry has been created.
- Click on the respective row in the table to open the sidebar.
- From there, select the option to Sync to Xero.
- After syncing, the Is Accounting Synced column in the respective table will display Yes to confirm successful synchronization.
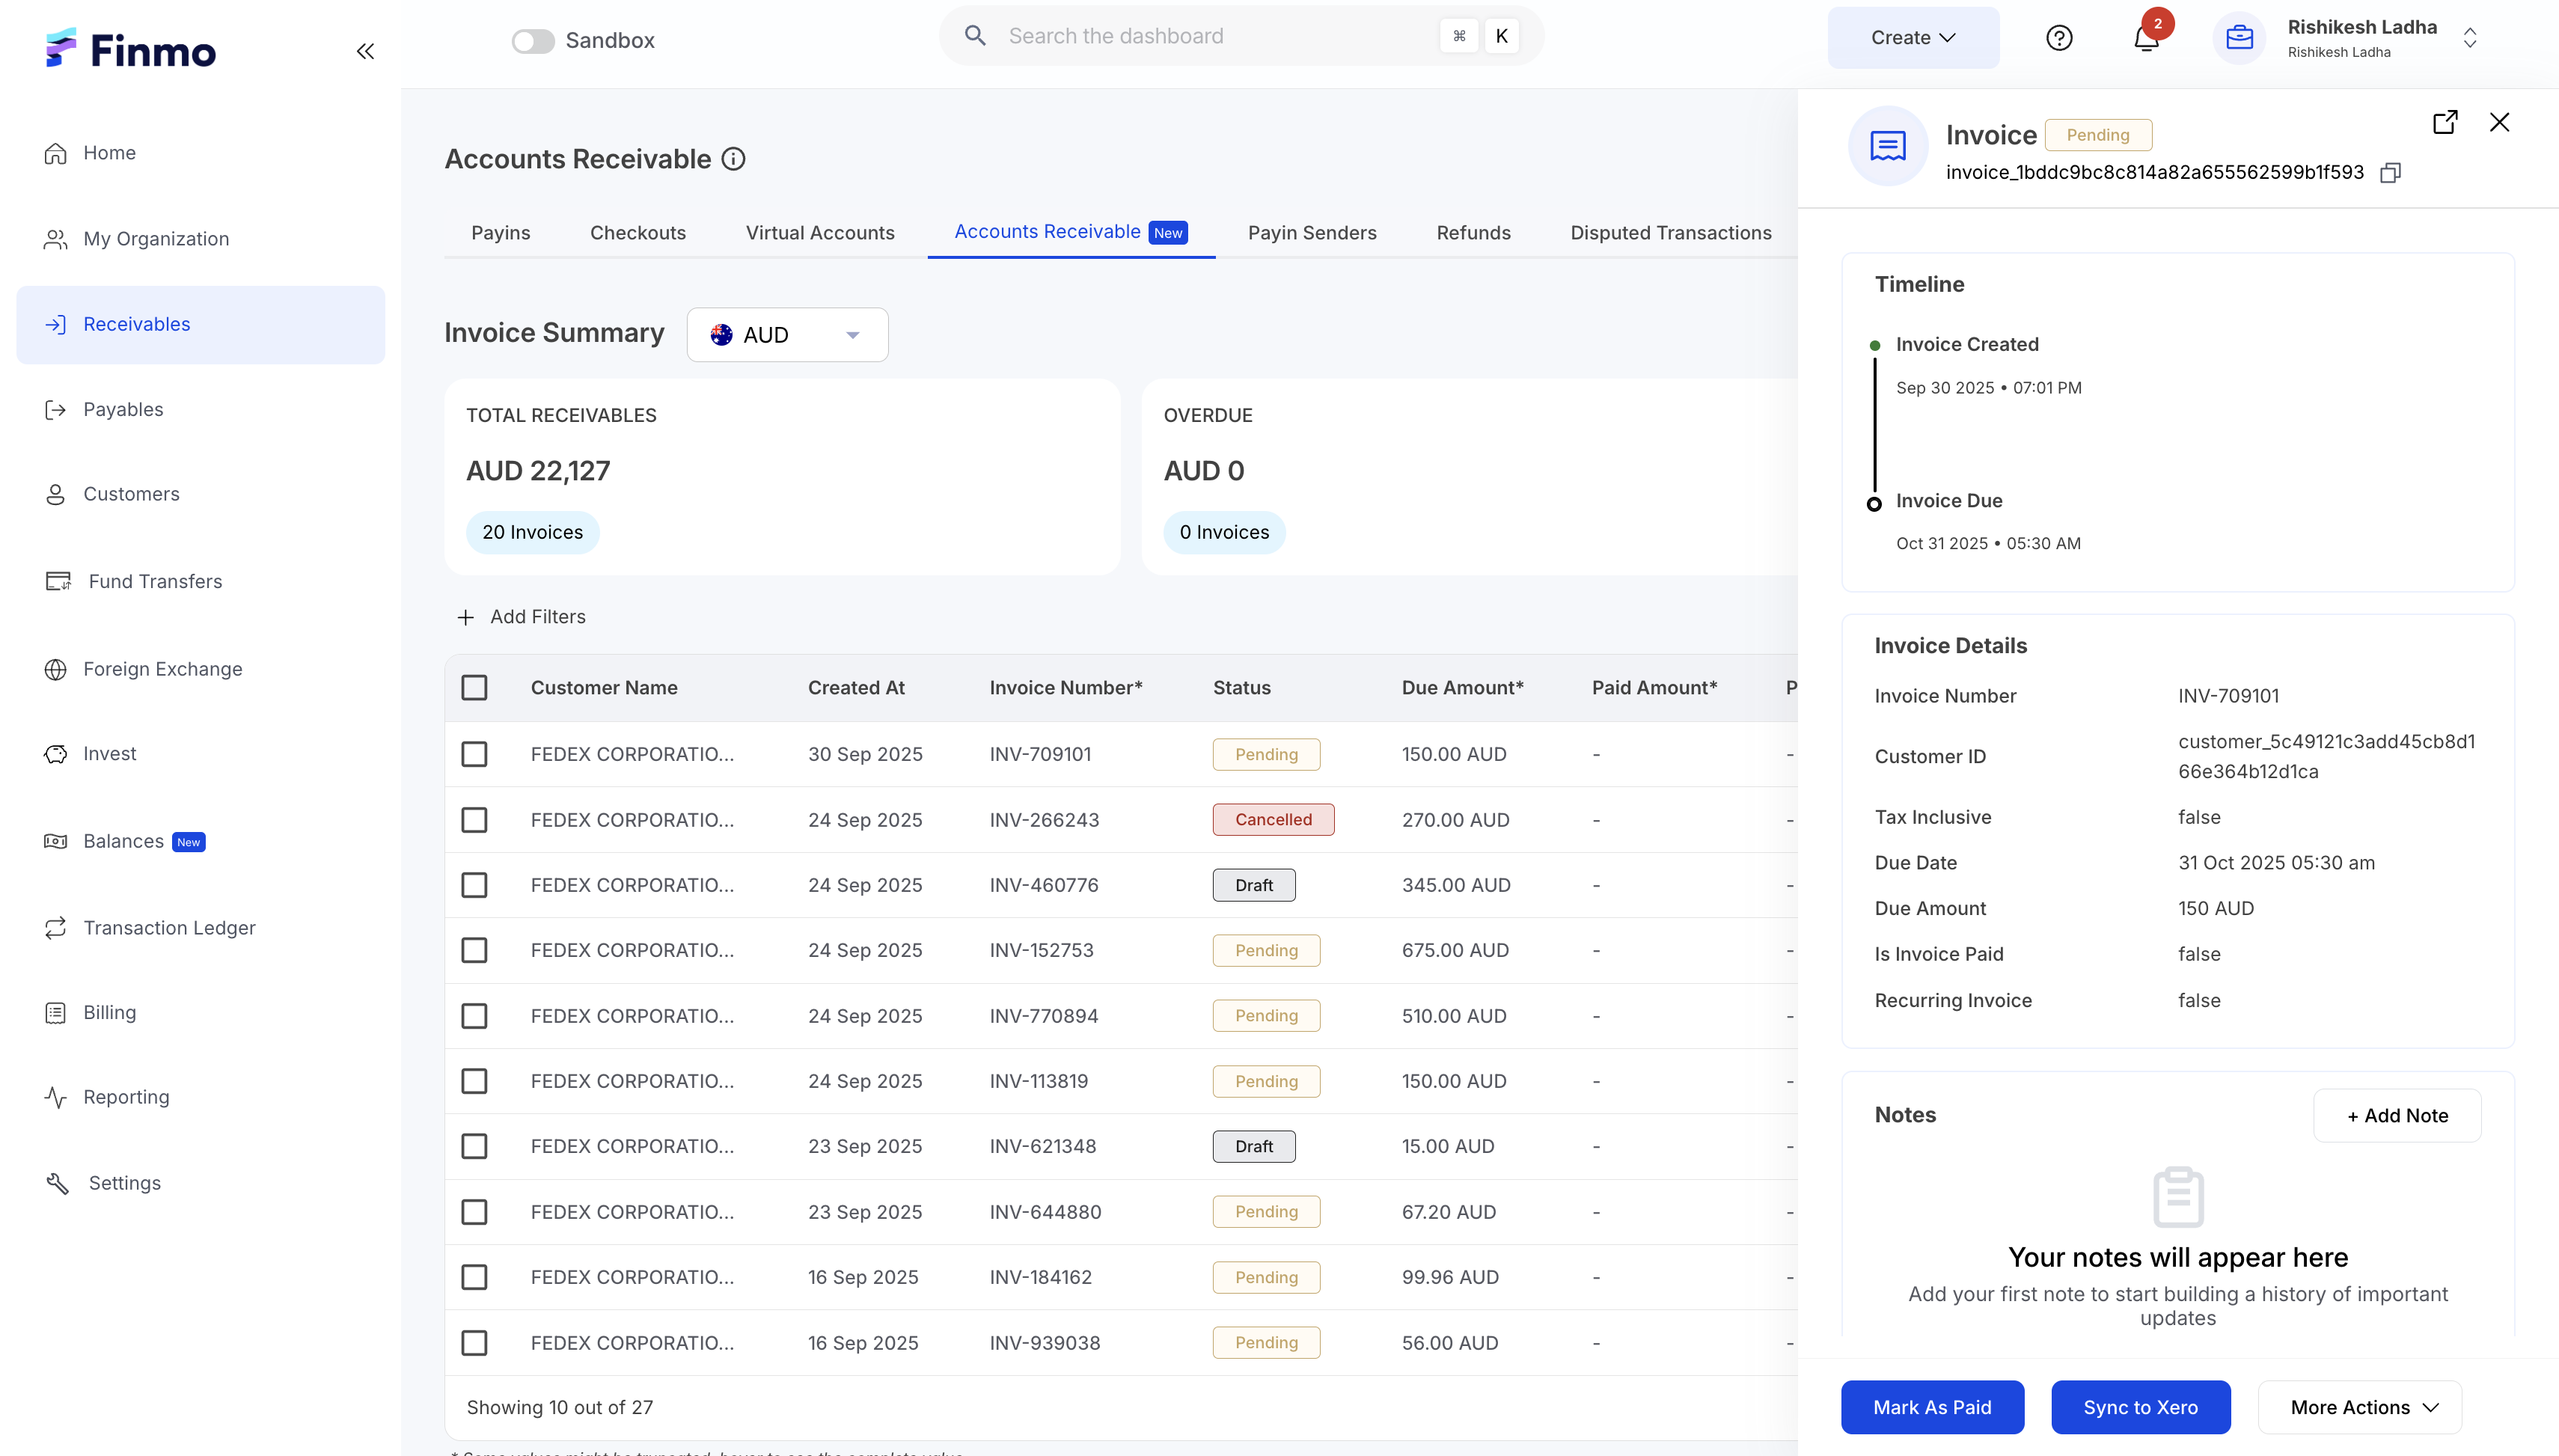
- Once syncing is complete, the respective AR and AP entries will be available in Xero under the Invoices or Bills section.
Steps to Pull AR & AP from Xero
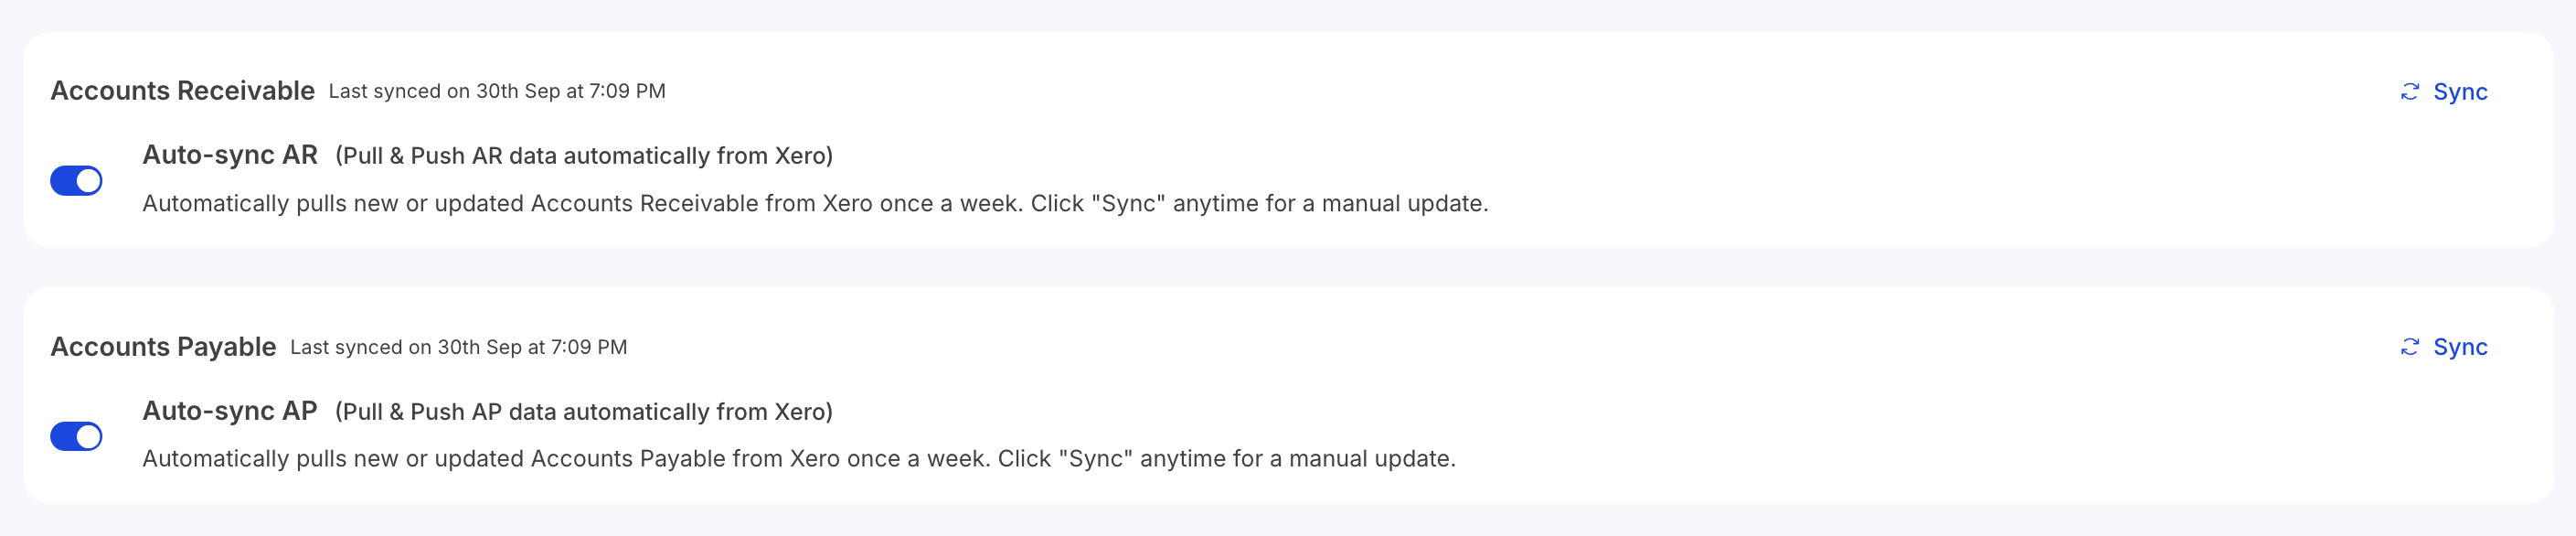
- AR and AP created in Xero can be pulled into Finmo with a single click. In the Xero Configuration section, you can enable Auto Sync to automatically pull AR and AP records from Xero, or use the Sync button to pull them on an ad-hoc basis.
- In the Accounts Receivable and Accounts Payable cards, merchants can view the last sync timestamp for AR and AP.
- This section also allows you to automate the process of pushing AR and AP from Finmo to Xero.
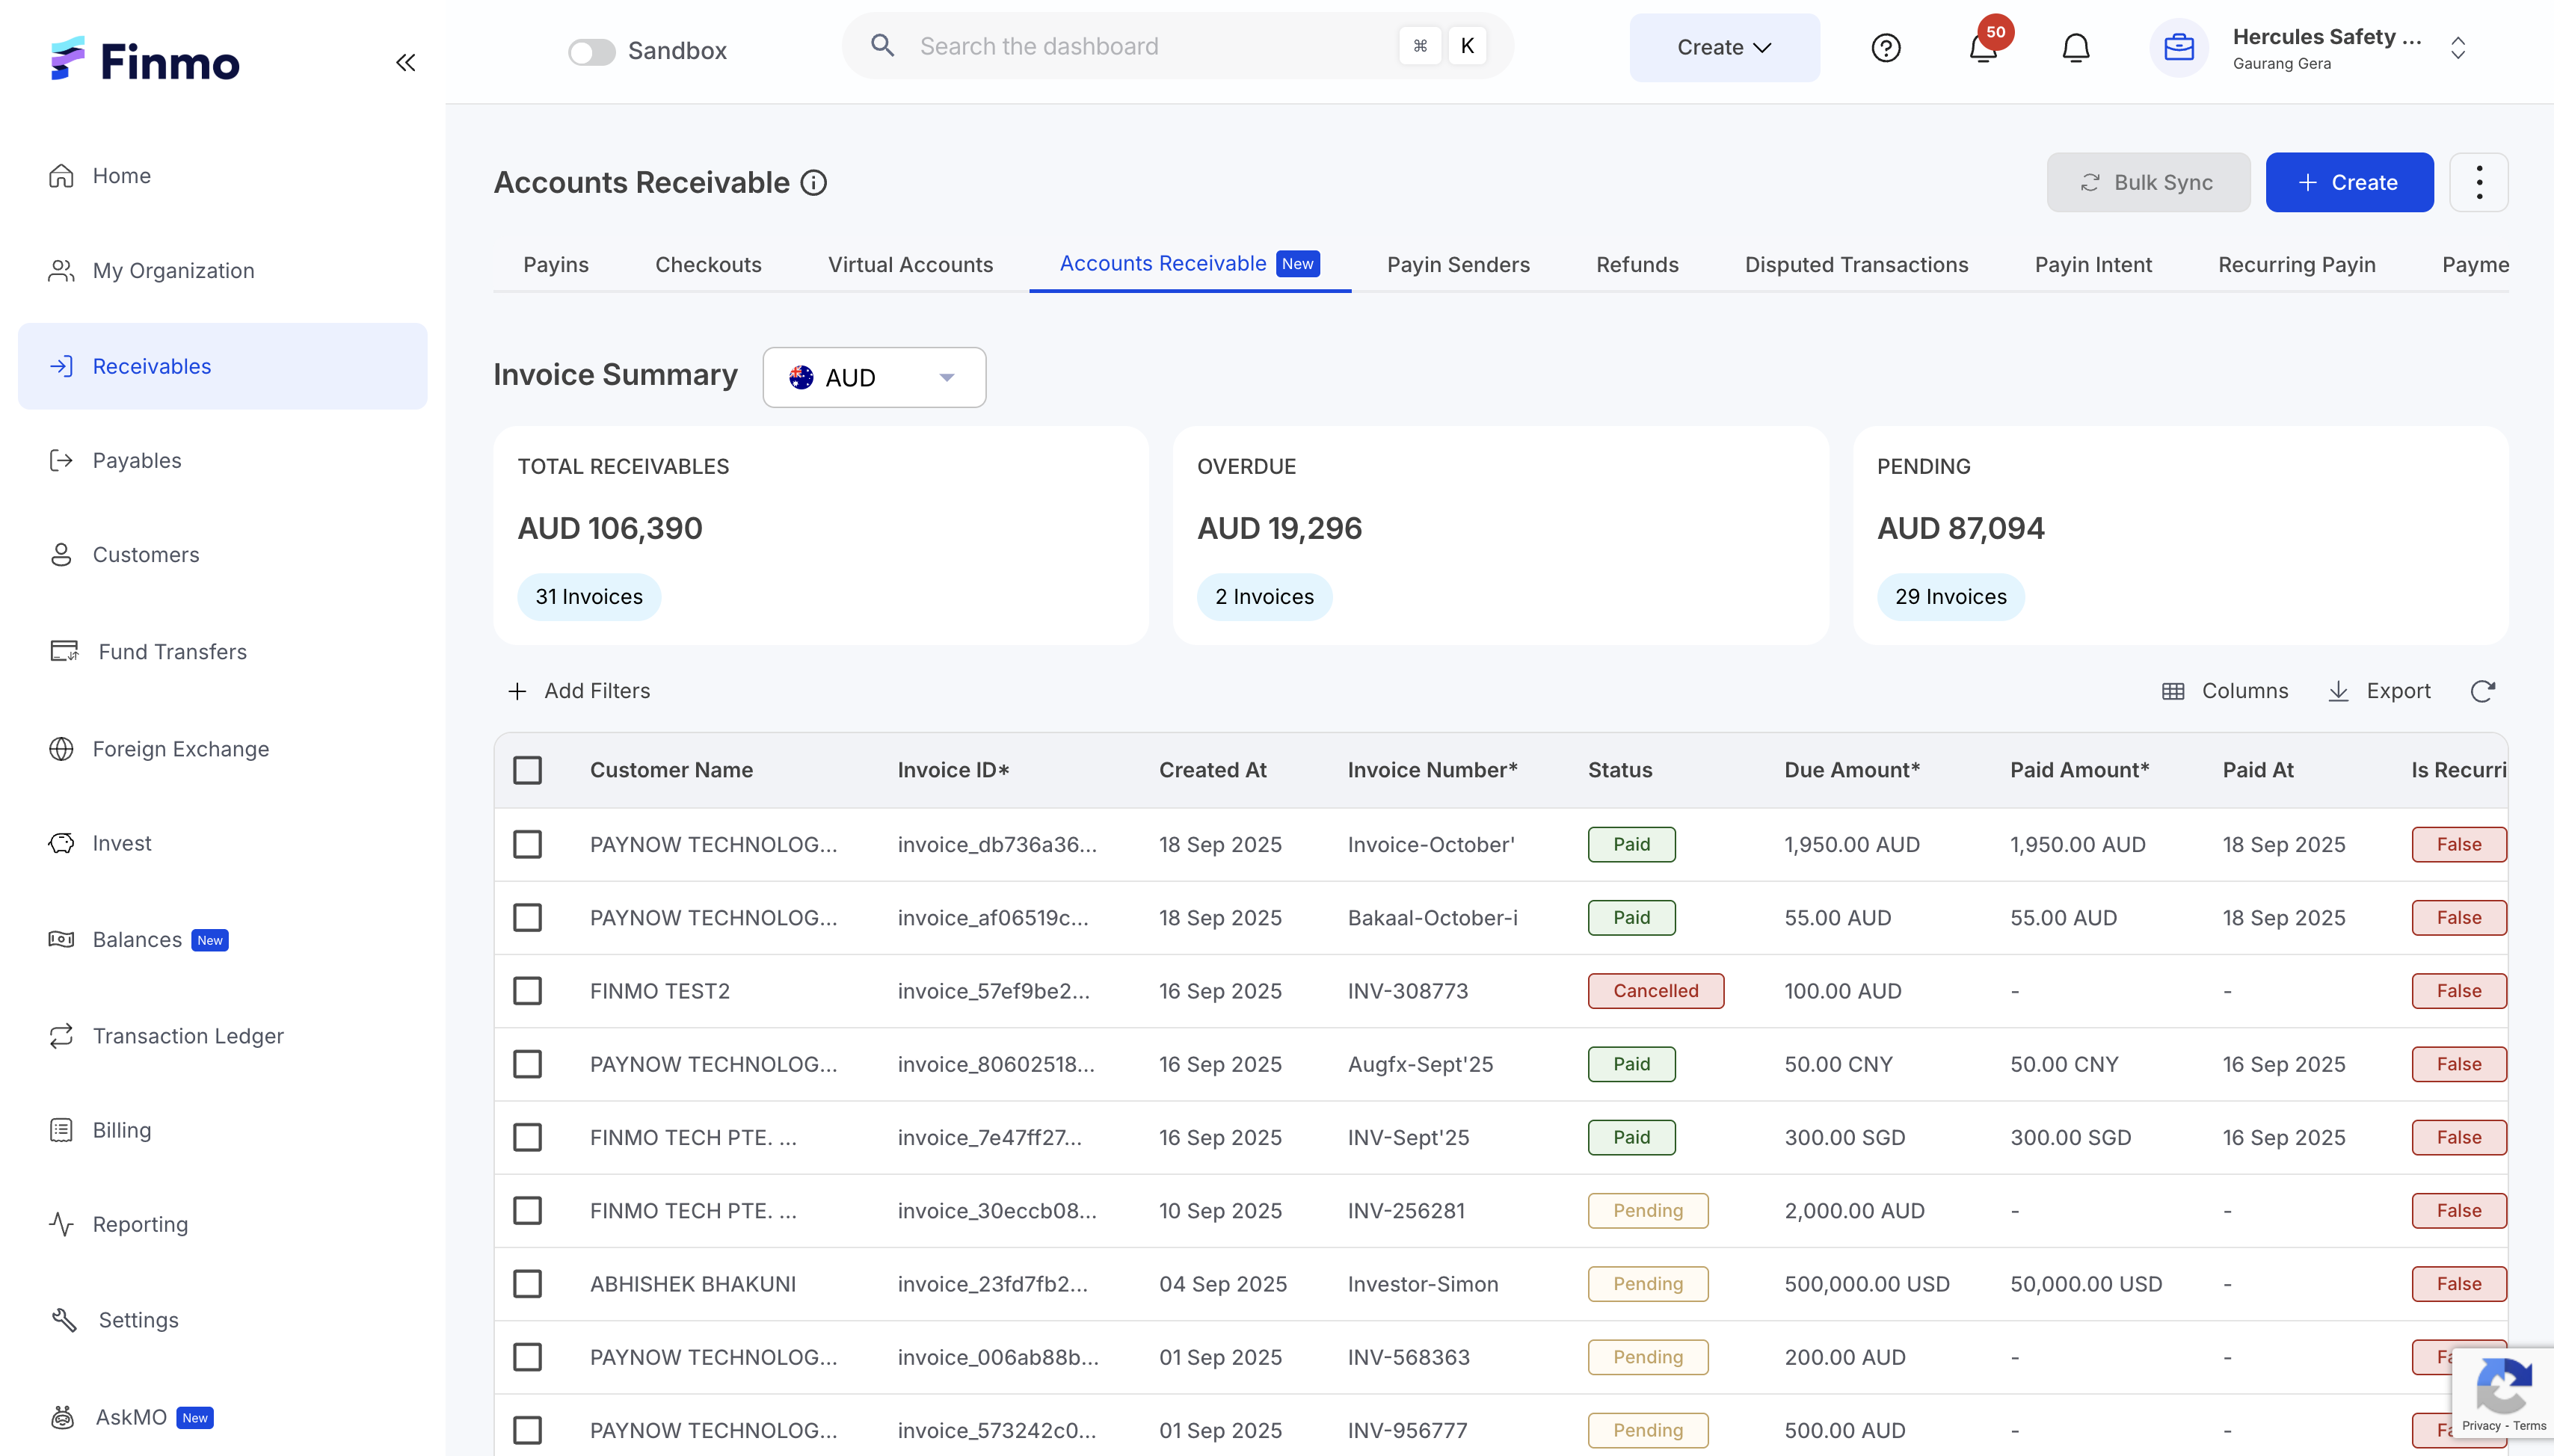
Bulk Sync
In both the Accounts Receivable and Accounts Payable sections, you can use the Bulk Sync functionality to sync multiple invoices or payables to Xero at once. Simply select the desired records and click the Bulk Sync button at the top.
Updated 8 months ago