Checkout
Overview
The Checkout module under the Receivables section empowers businesses to easily create, share, and manage payment links to collect funds from customers. Whether you're collecting one-time payments or recurring dues, checkouts are the simplest way to initiate a payment request without needing to set up virtual accounts or complex invoicing flows.
Checkout Creation Steps
Step 1: Click on the Create Checkout CTA in the Receivables section
Create Checkout CTA in the Receivables section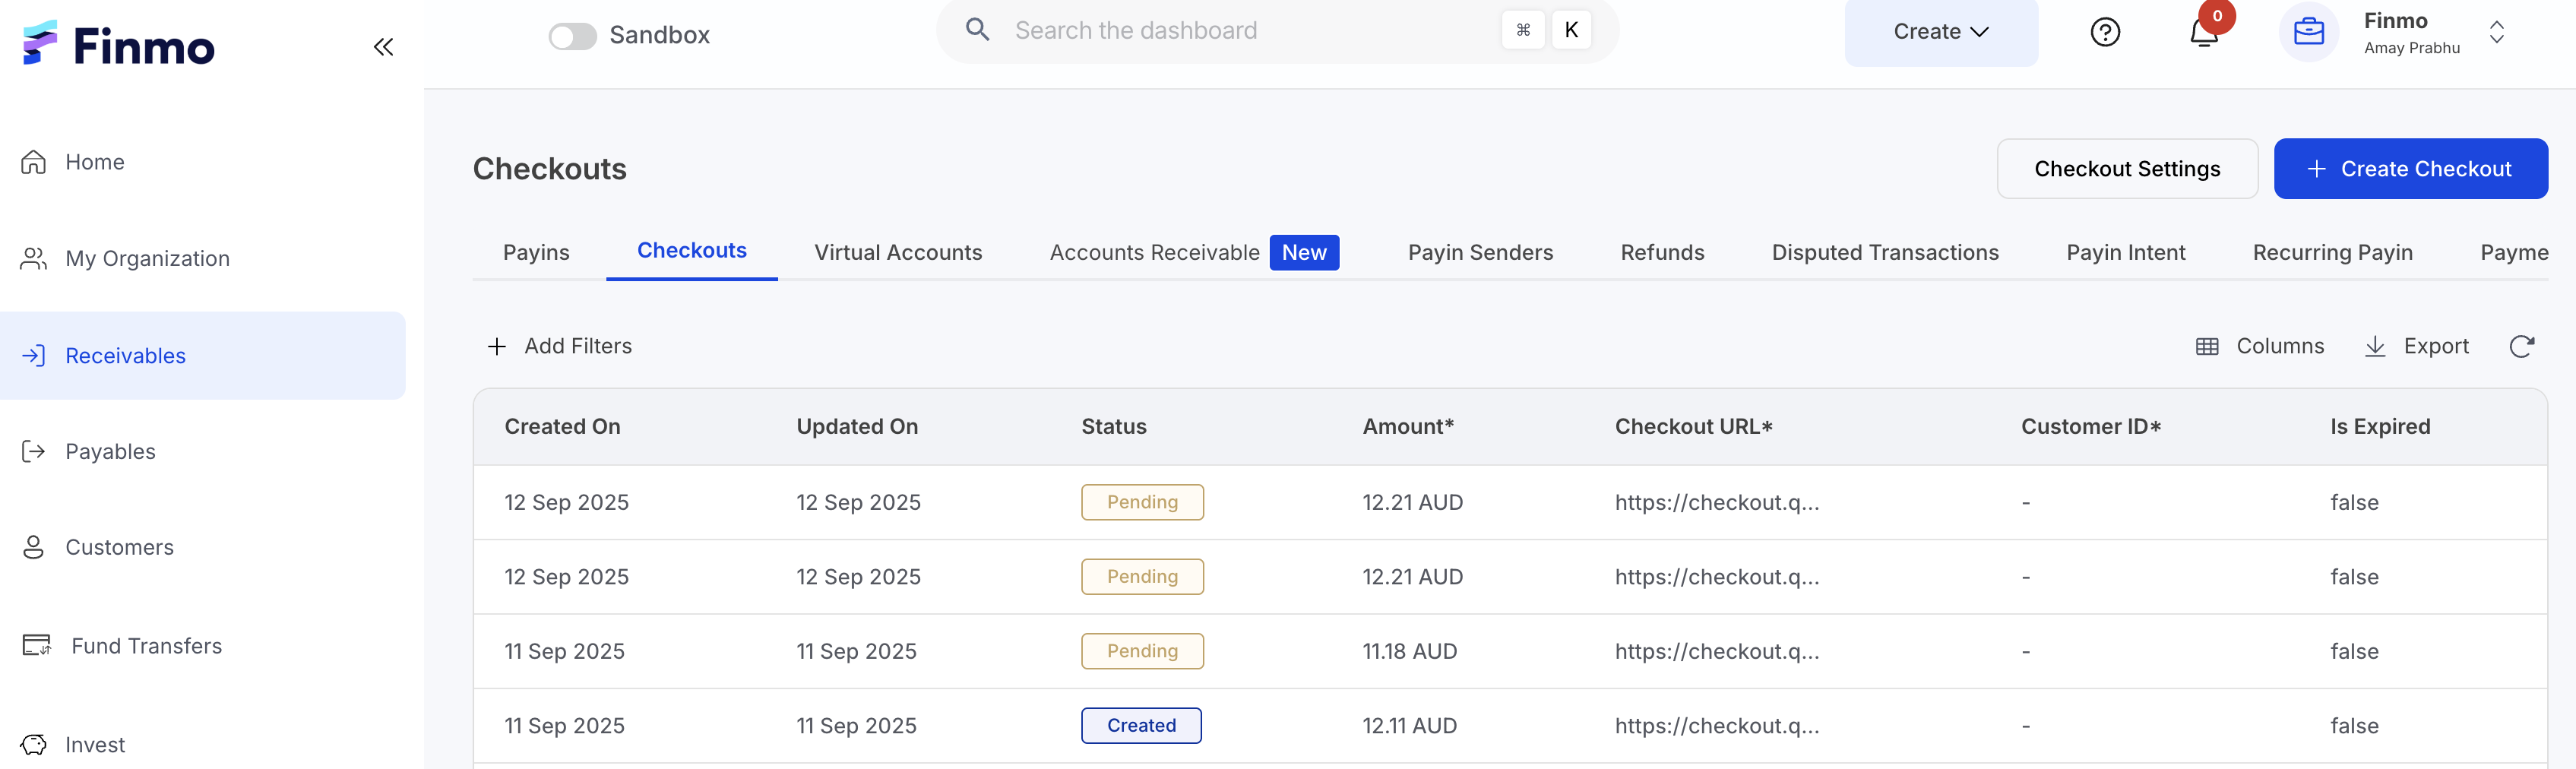
Step 2: Select the Country and the Currency
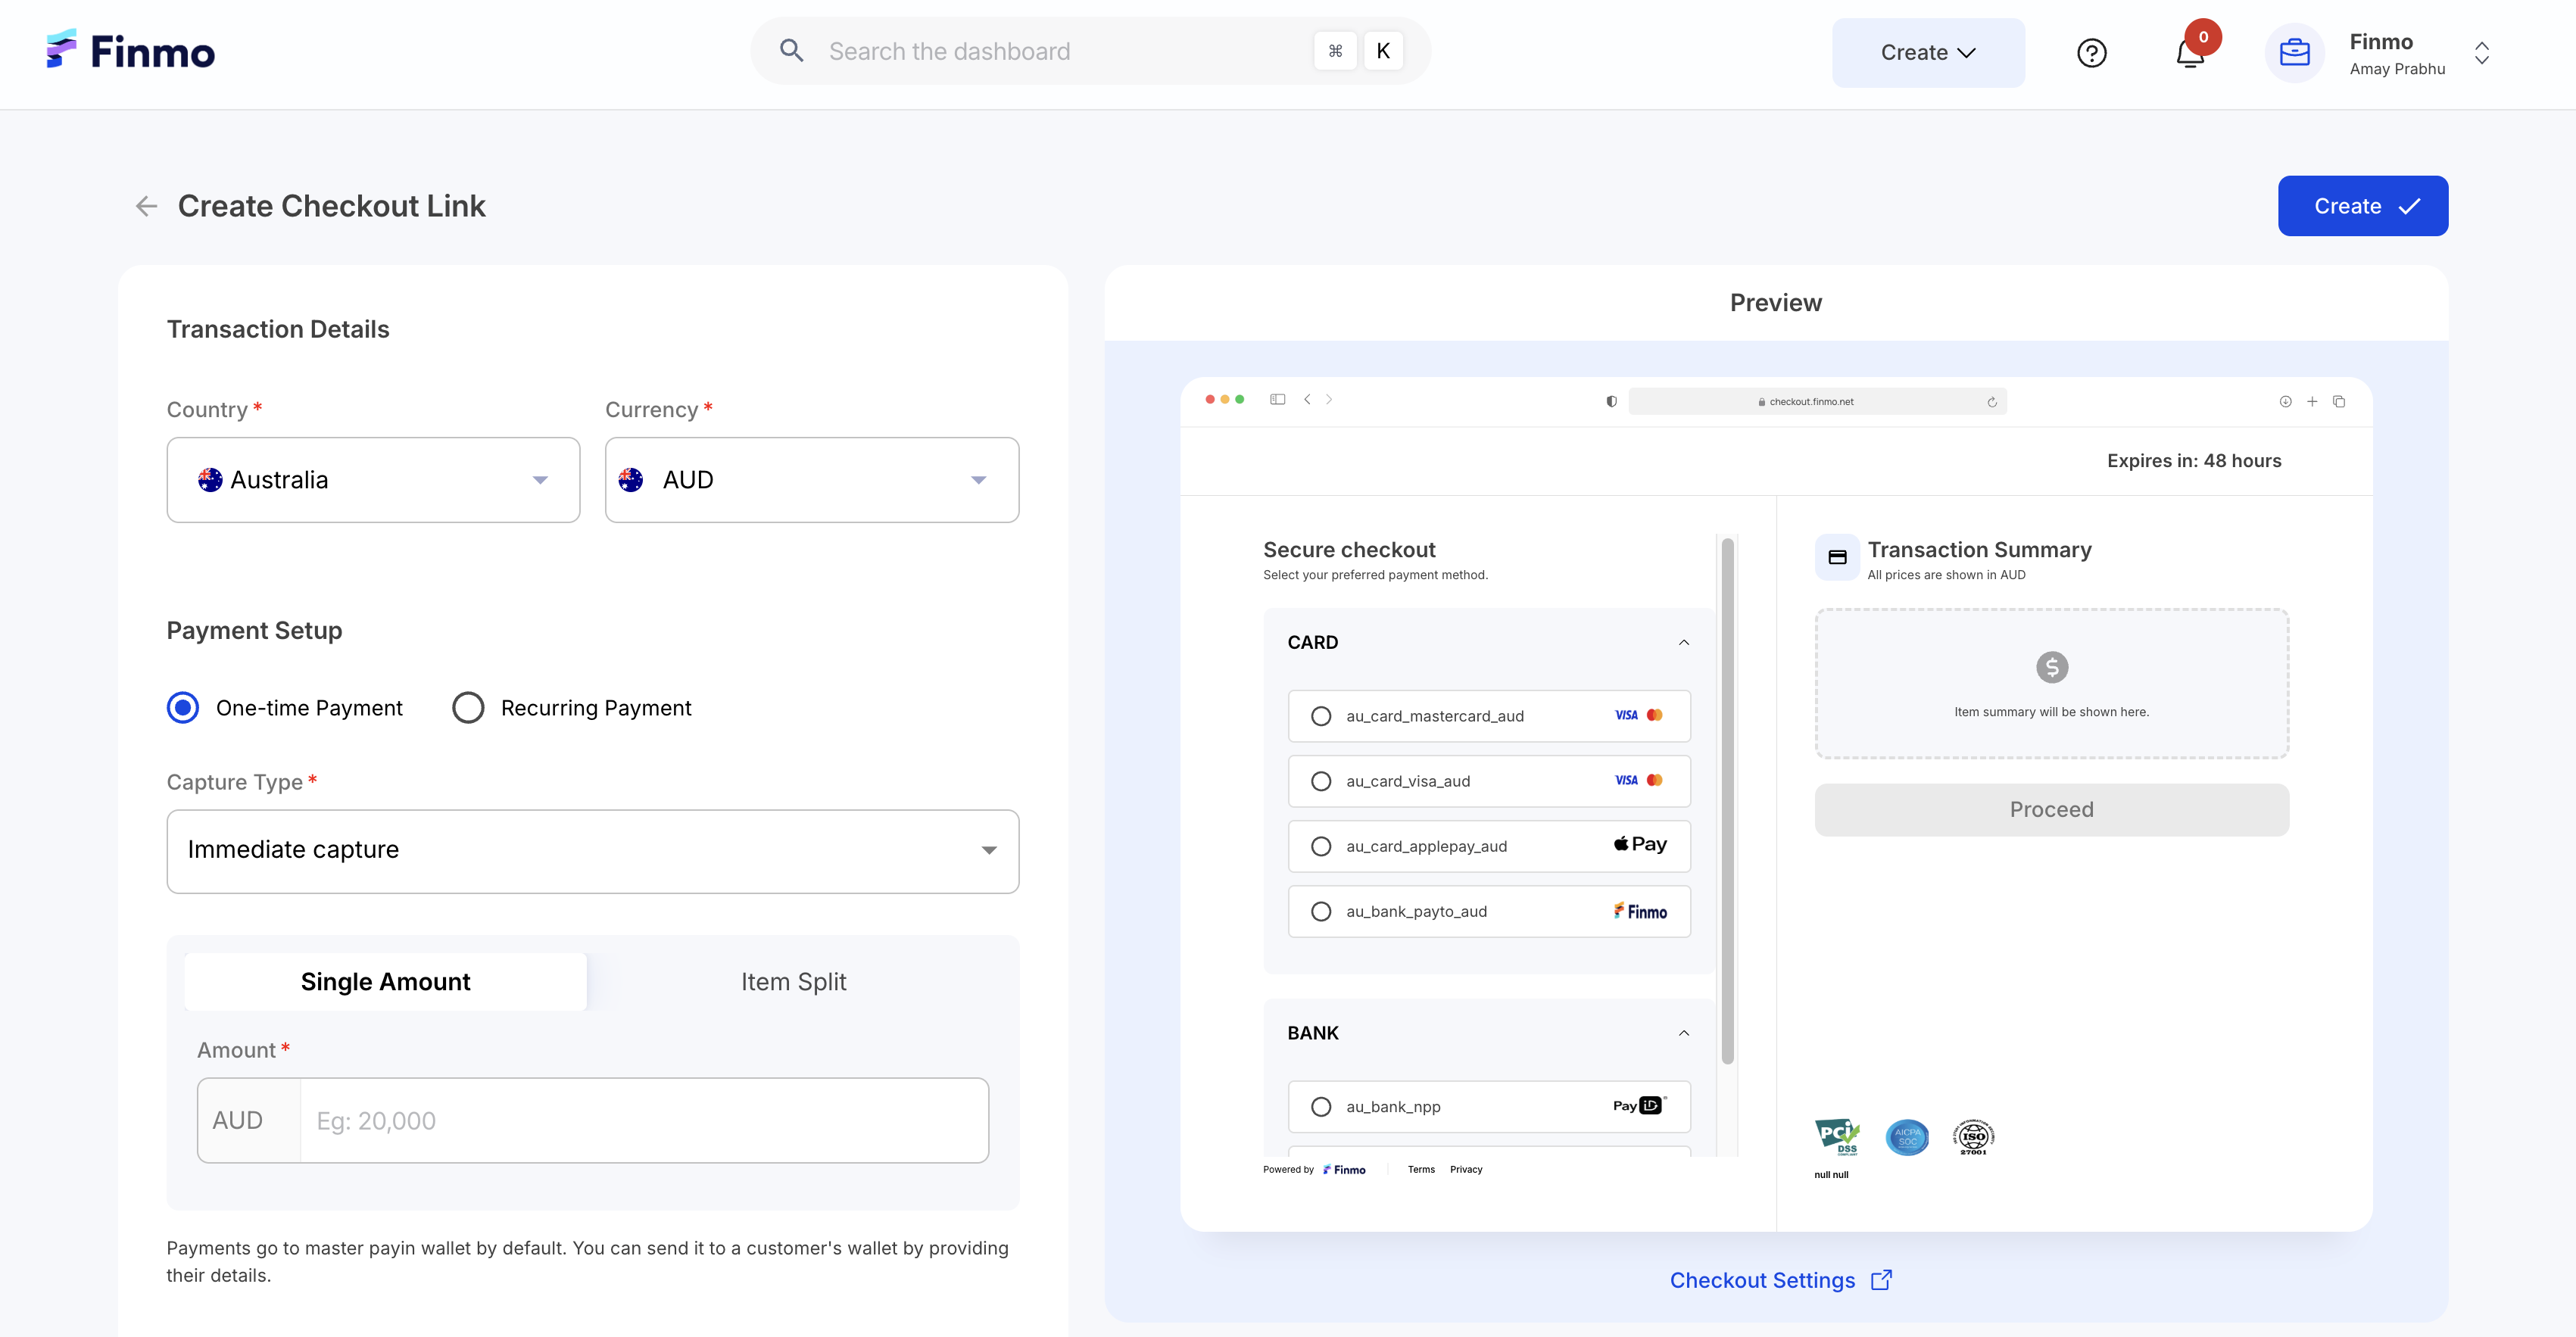
This step will determine the payment methods that will be available for your customers at checkout.
Step 3: Select the Payment Setup
Select One-time Payment when the customer is making a single purchase, and select Recurring Payment when the customer is being charged on a regular schedule, such as subscriptions plans.
Supported Countries: Recurring payment is currently supported in Singapore and Australia.
Create a One-time Payment Checkout
Step 1: Select the Payment Set Up
In Payment Setup, select One-time Payment
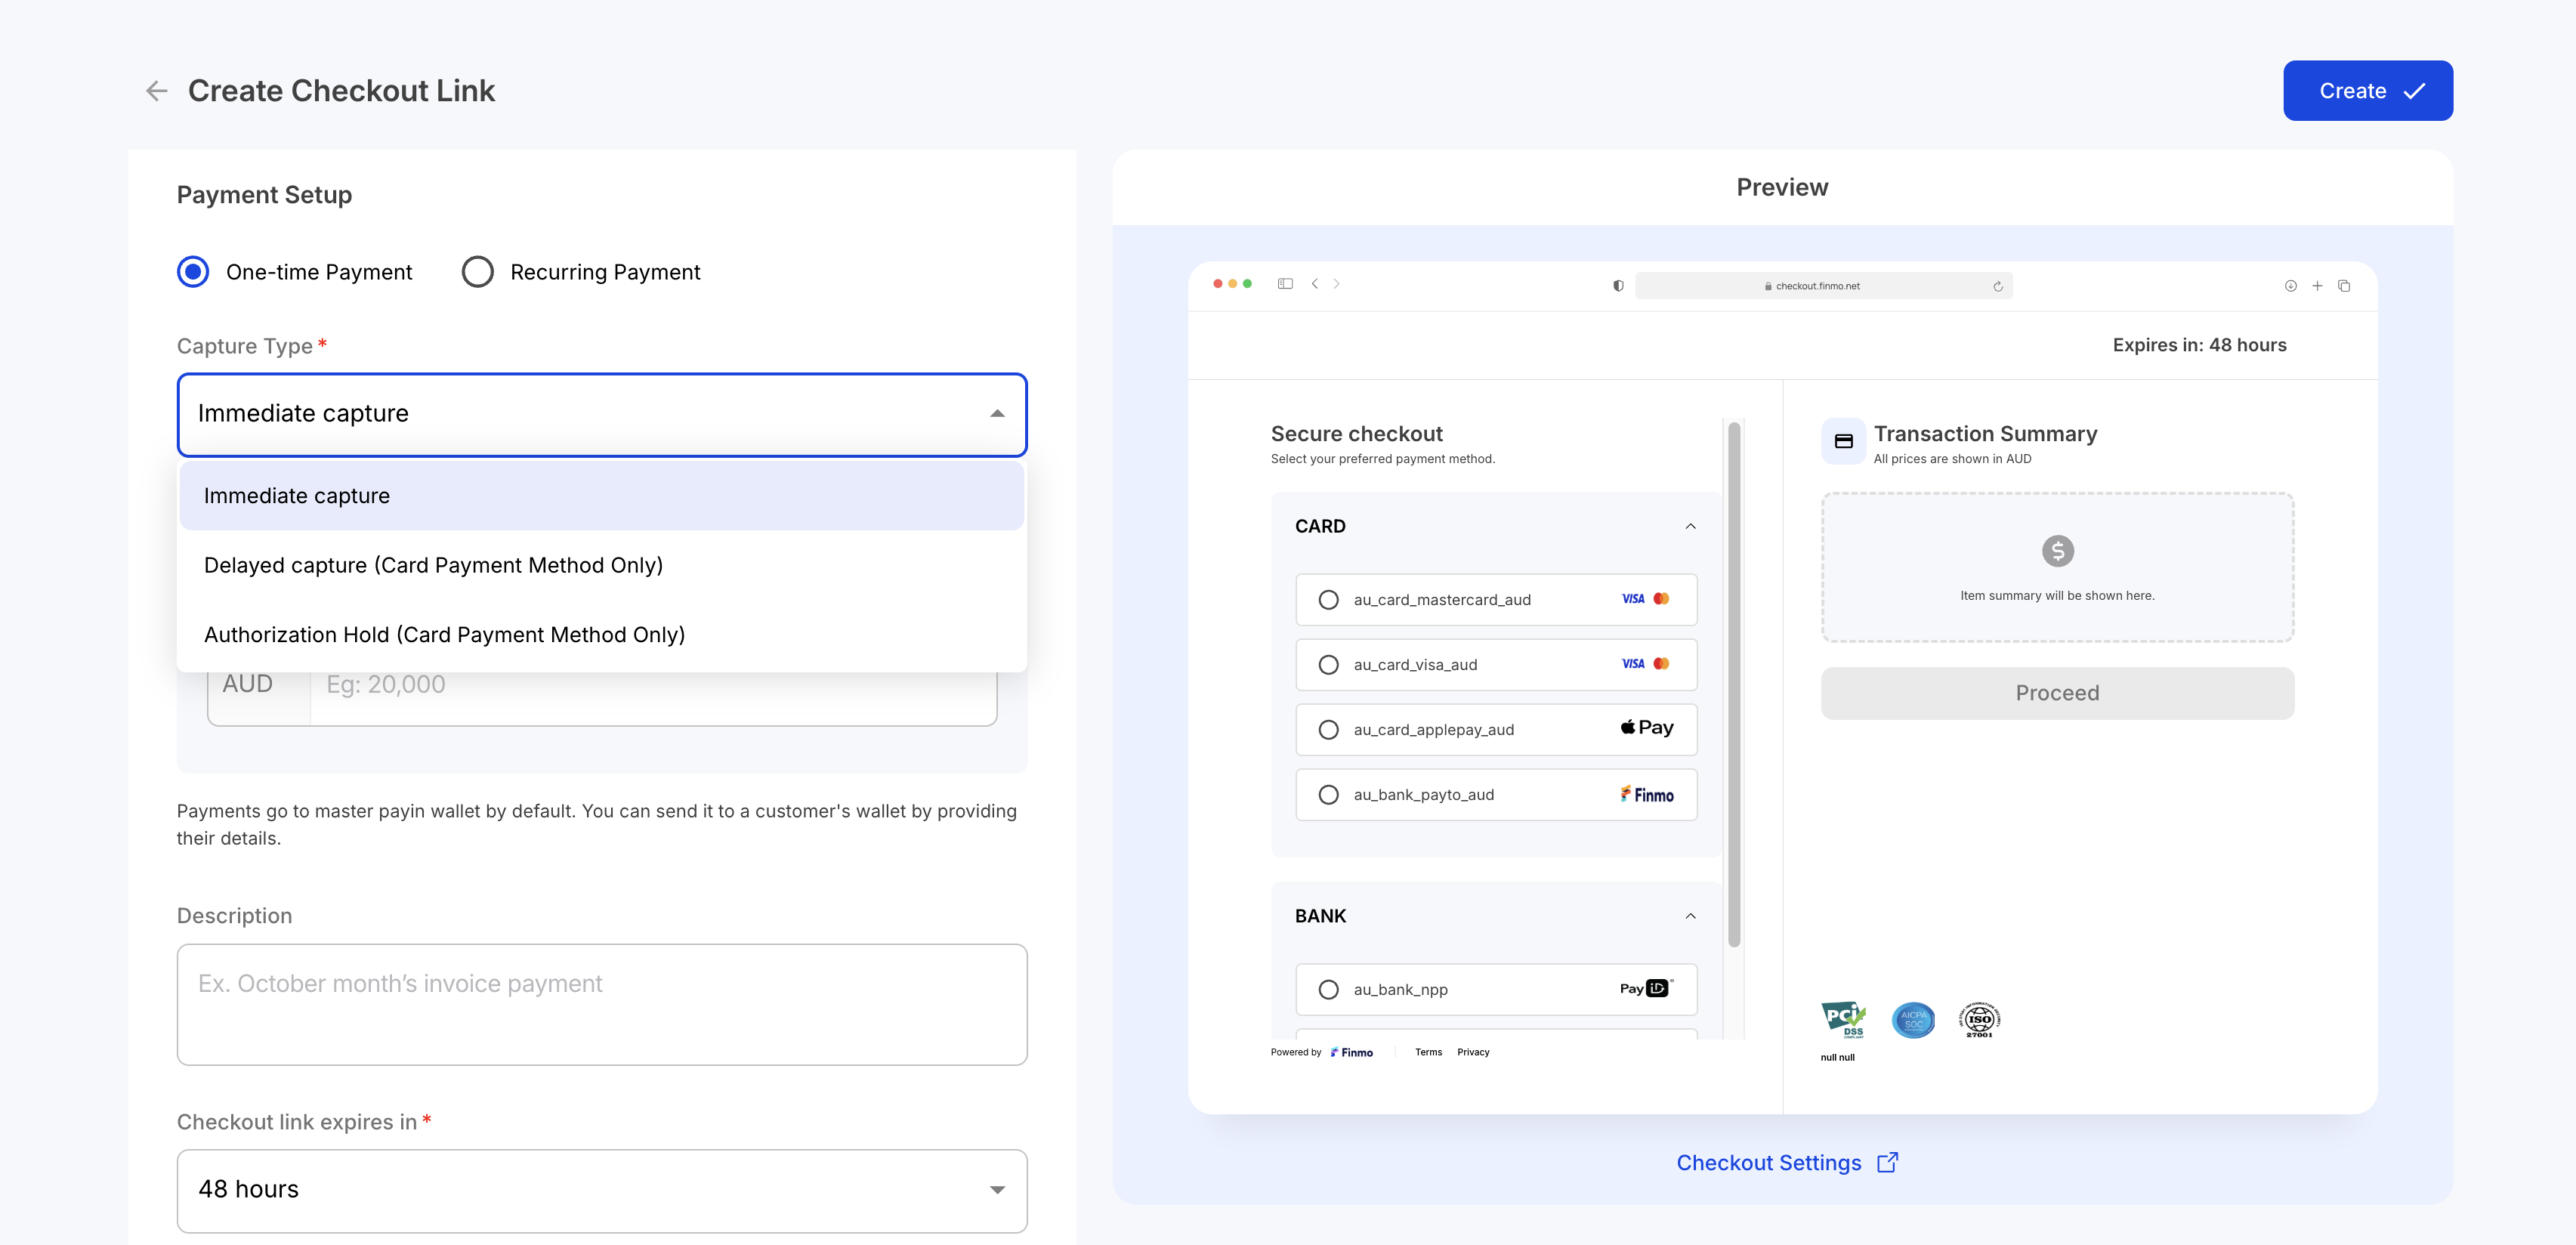
Step 2: Select the Capture Type
A Capture Type allows you to define how and when you want the funds to be collected from your customers after a card payment is authorized. The table below outlines the different capture types that Finmo supports for one-time payments.
| Capture Type | Description |
|---|---|
| Immediate Capture | Funds are captured immediately after authorisation. |
| Delayed Capture | Funds are automatically captured after a specified number of days set at checkout creation. When this option is selected, an additional field appears to configure the delay period. |
| Authorization Hold | Places a temporary hold on the customer’s card, confirming funds are available, with the final charge captured later. The capture must be done manually; otherwise, the authorization will be released. |
Delayed Capture and Authorization Hold will be applicable for Card Payment methods only.
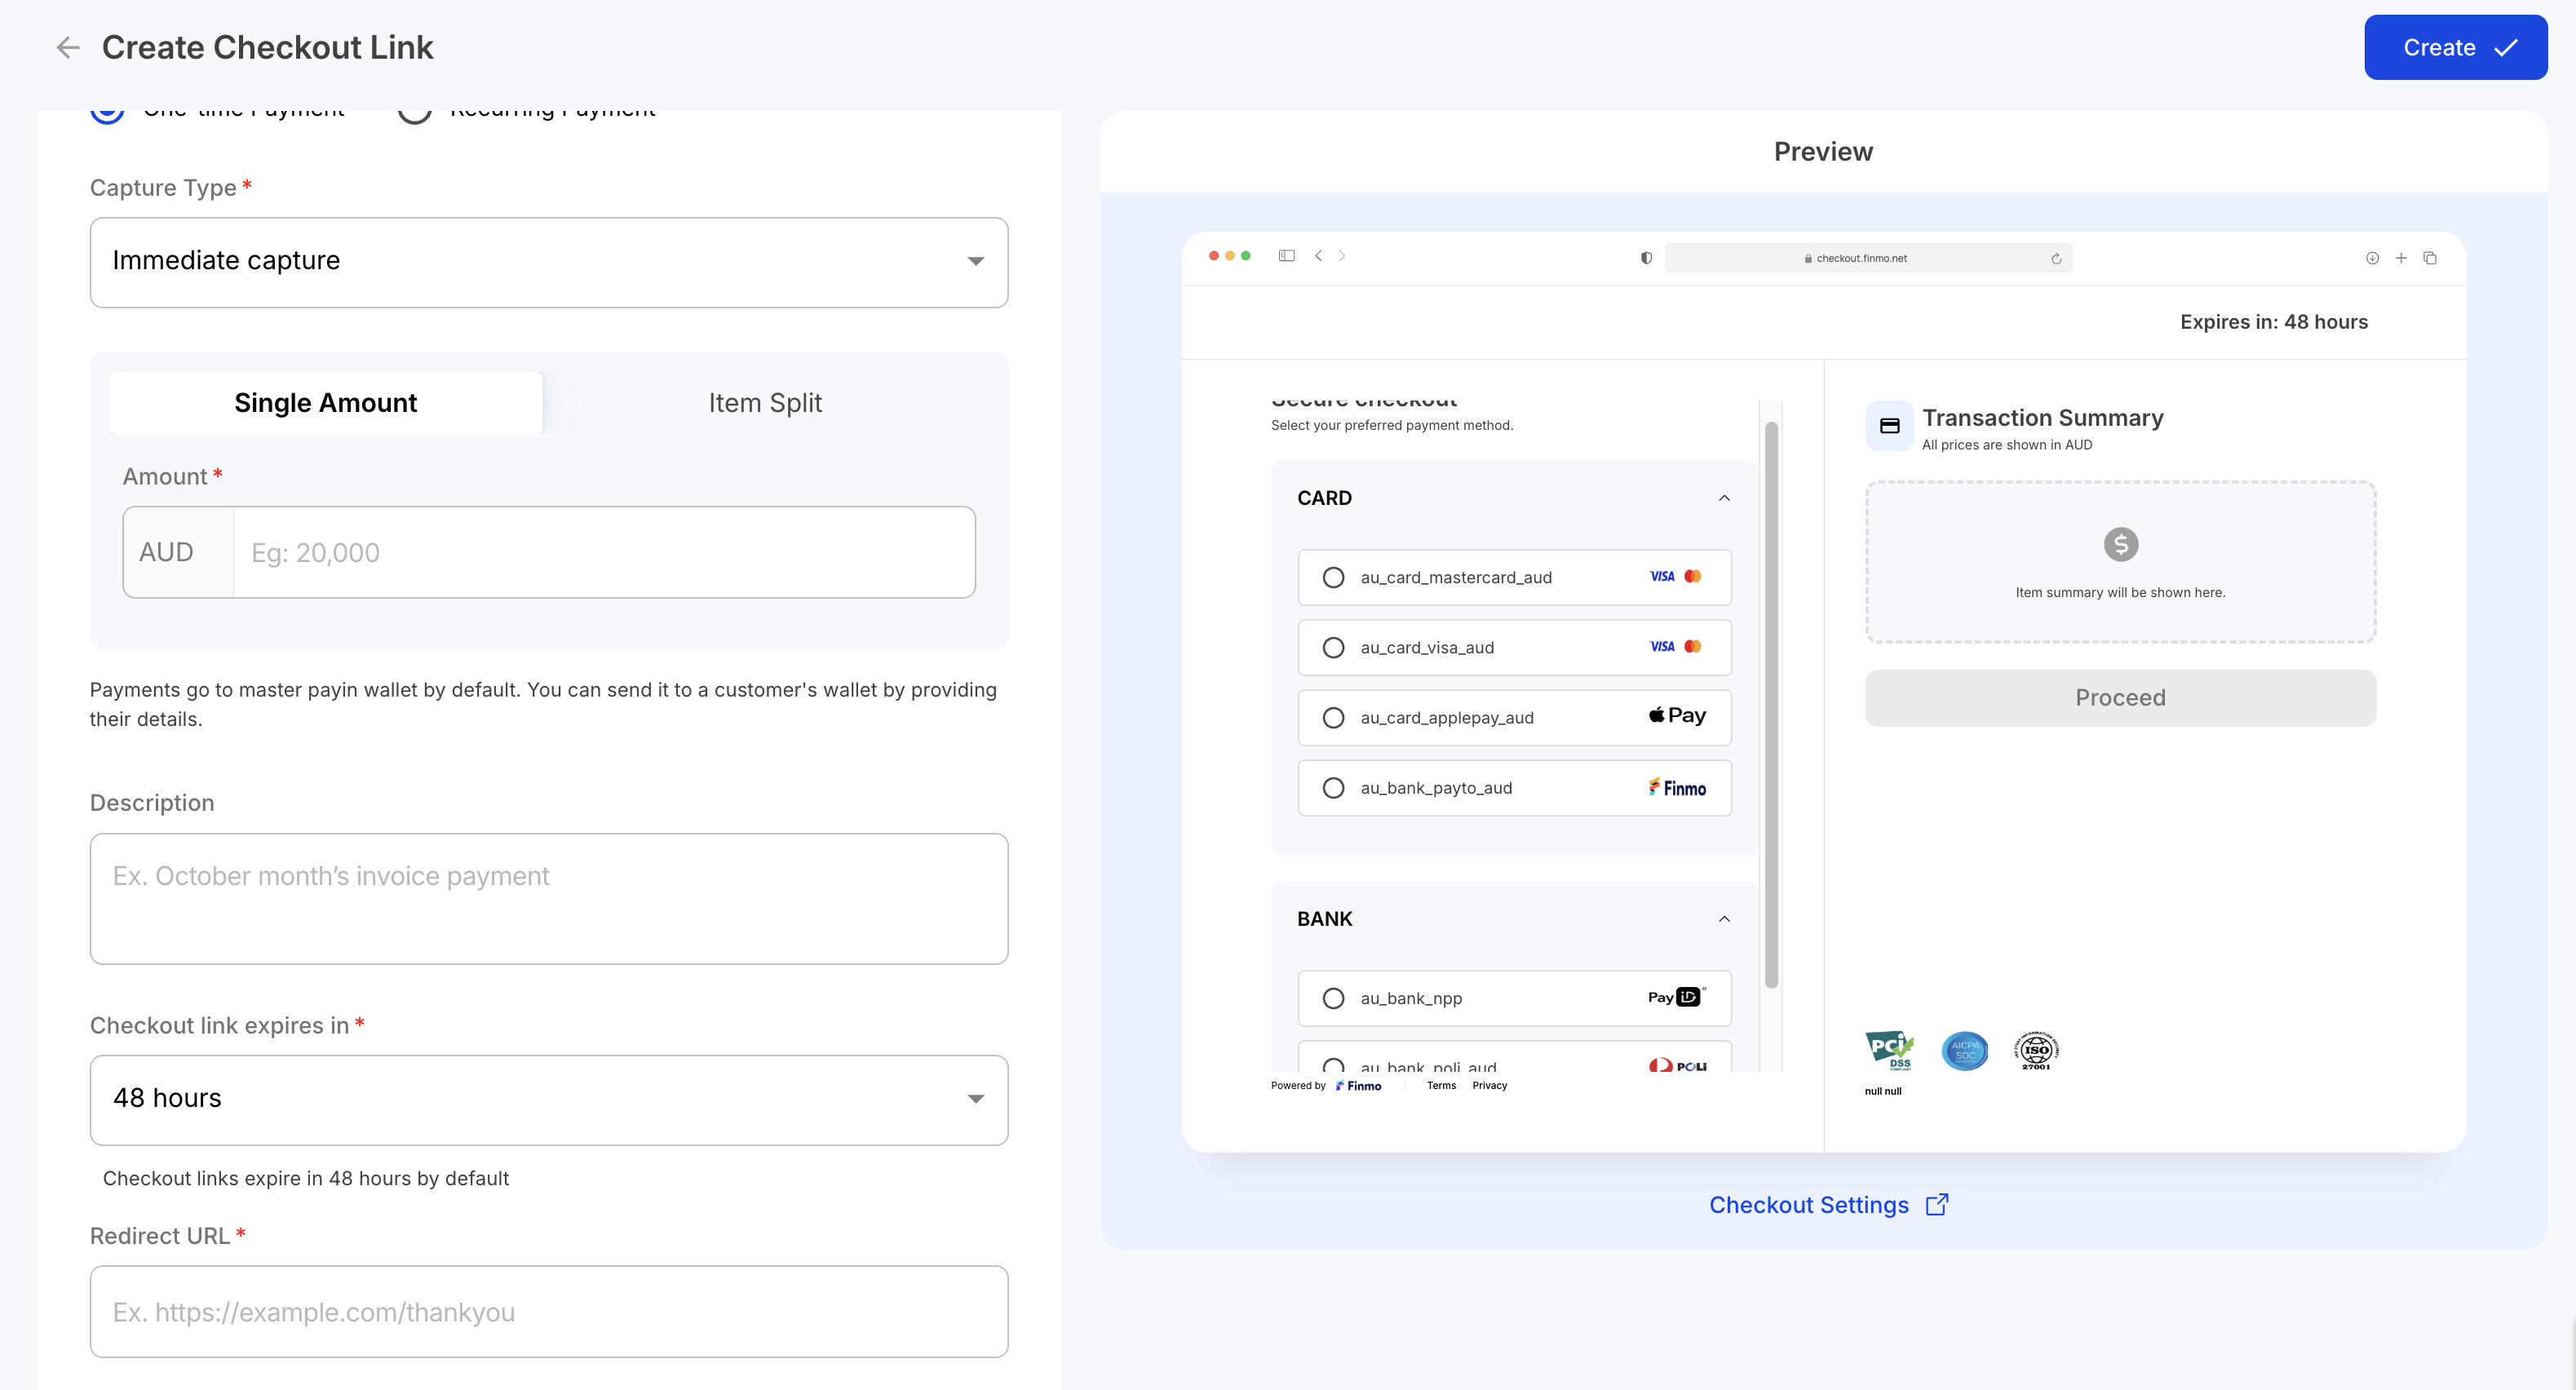
Step 3: Enter the other fields
Enter the Amount, Description, Link Expiration Window & the Redirect URL
| Field | Description |
|---|---|
| Amount | Select a single amount when the customer is being charged a fixed total for the entire order, or select an item split when the customer is being charged for individual products or services separately. |
| Description | Provide an optional description for reference |
| Checkout Link Expiration | Configure the expiration window. By default, all checkout links expired in 48 hours |
| Redirect URL | Provide a URL to redirect customers after payment |
Step 4: Advanced Redirects (optional)
Configure the Advanced Redirect URLs for creating an enhanced post-checkout customer experience.
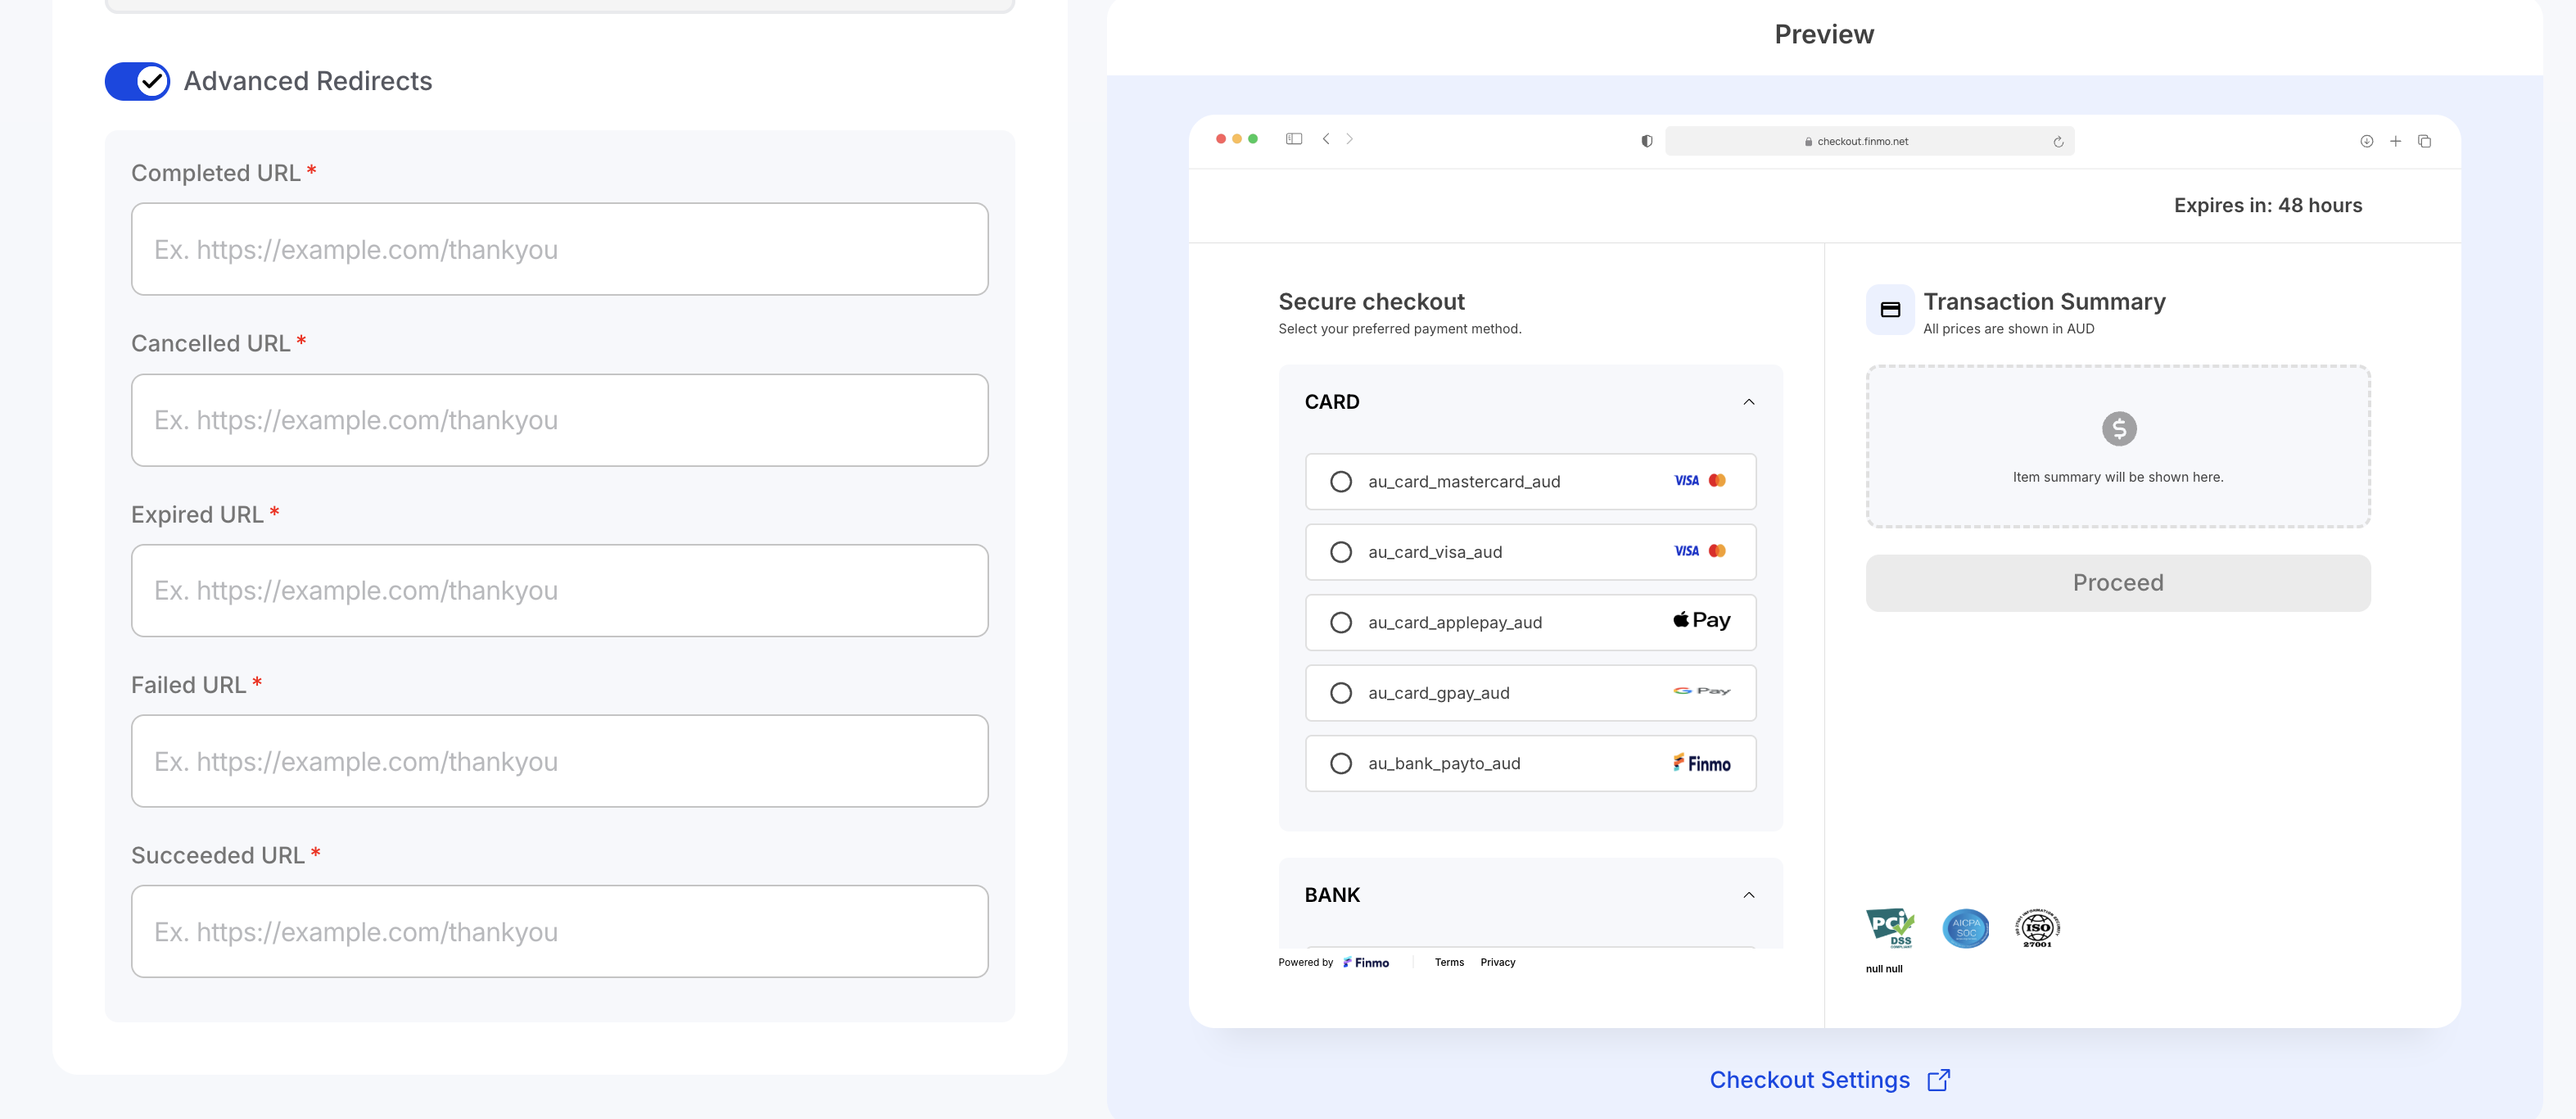
| URL | Description |
|---|---|
| Completed URL | Redirect customers here once the entire checkout flow is completed |
| Cancelled URL | Redirect customers here if they cancel the payment before completion. |
| Expired URL | Redirect customers here if the checkout session link expires before payment. |
| Failed URL | Redirect customers here if the payment attempt fails. |
| Succeeded URL | Redirect customers here when the payment is successfully captured. |
Step 5: Generate the Checkout URL
Upon filling the required fields, click on the Create CTA at the top right. Share the URL with your customers.

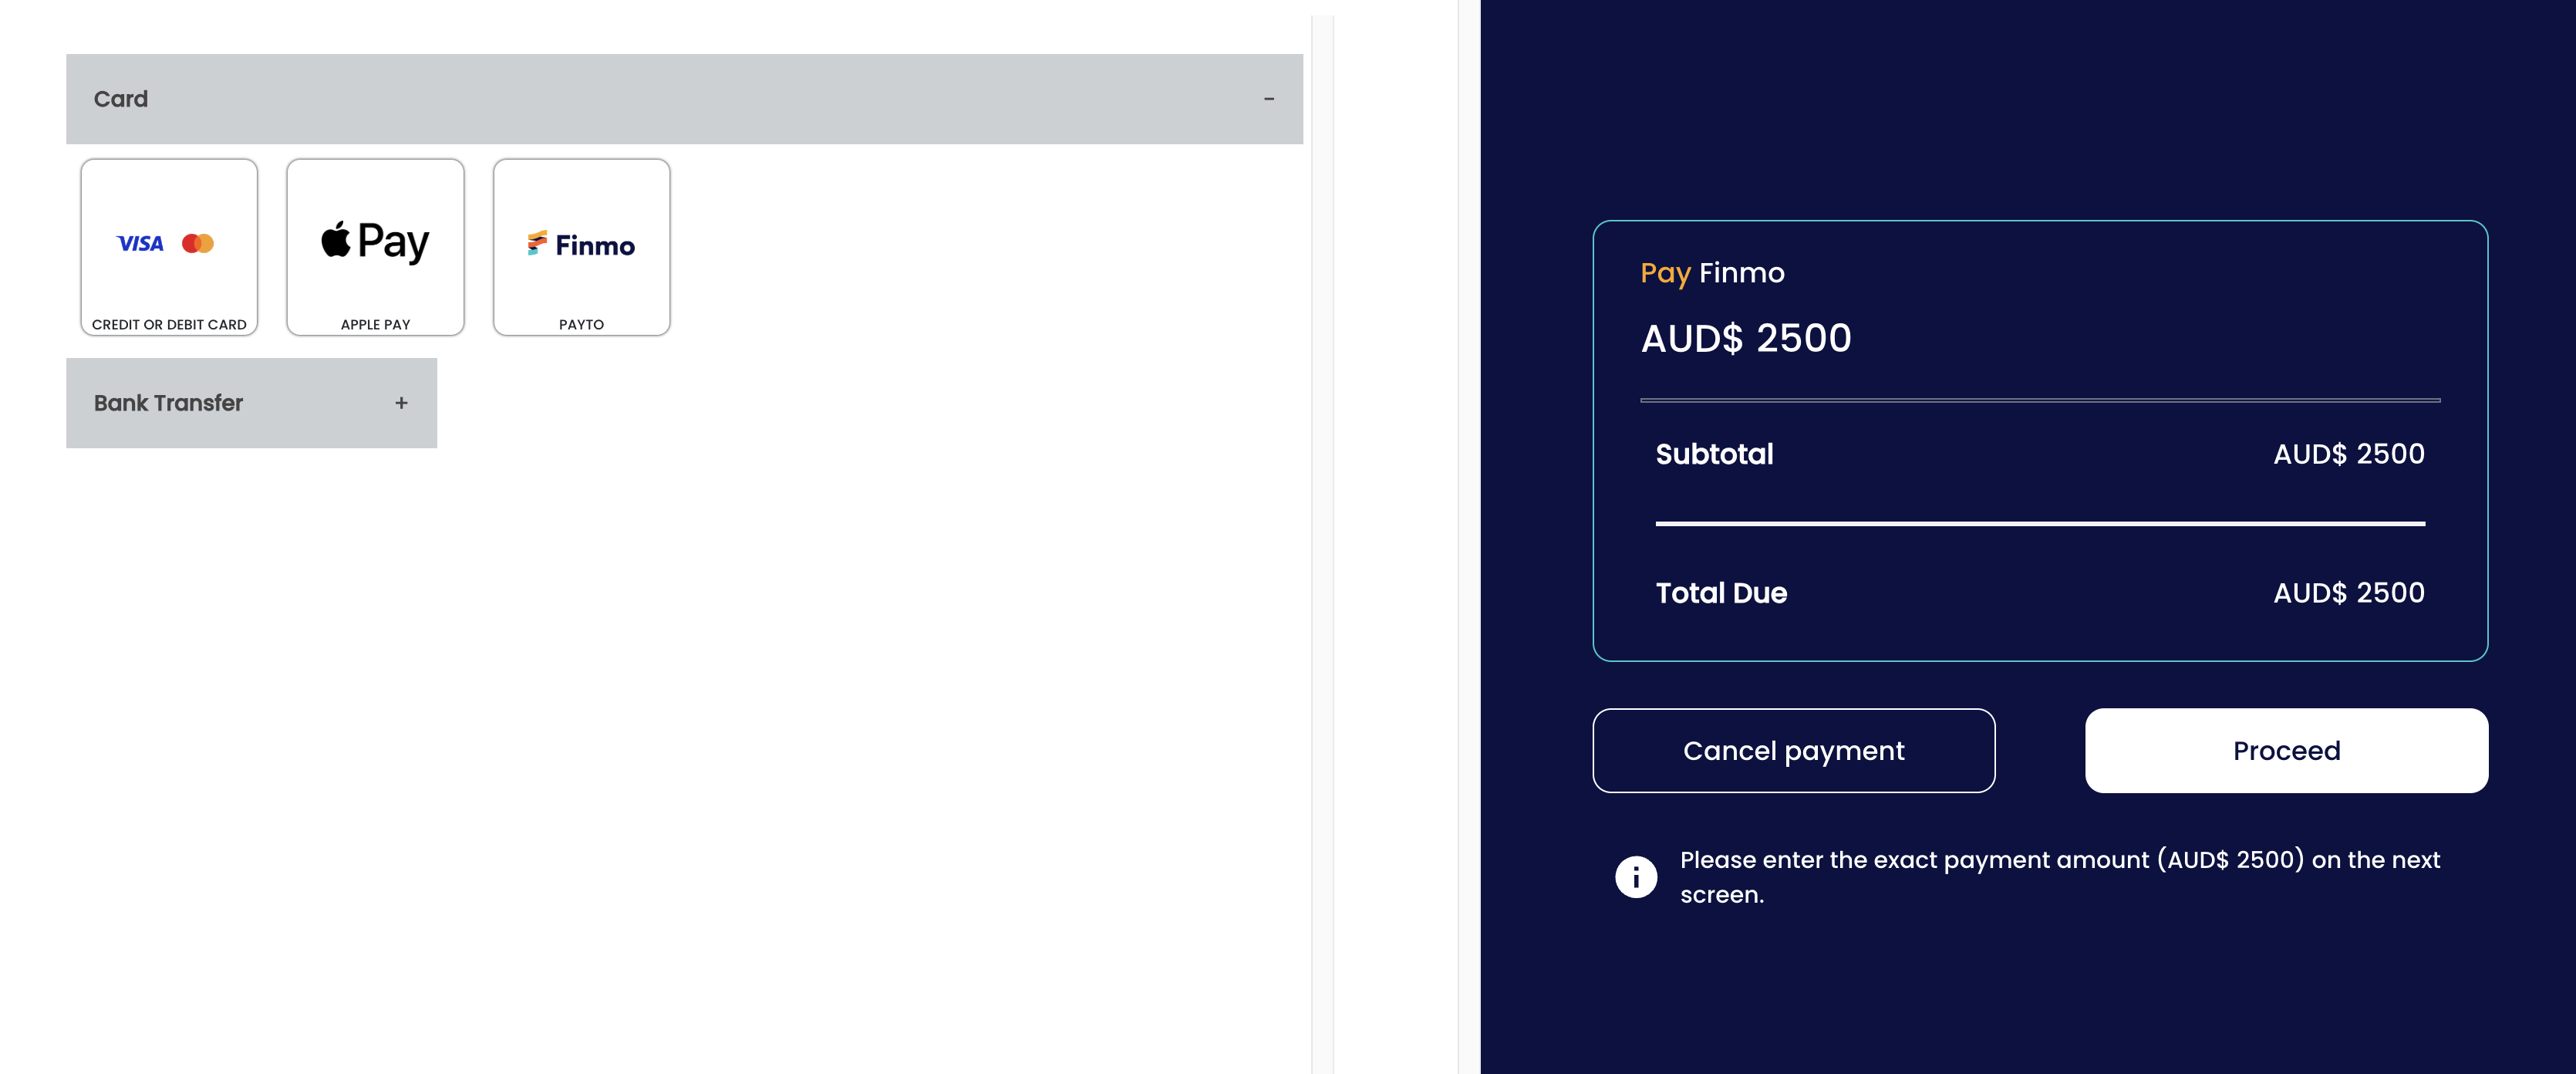
Step 6: Share the Checkout URL with your customers
When your customers open the URL, they will be able to pay in their preferred payment method on the checkout page.
Create a Recurring Payment Checkout
Step 1: Select the Payment Set Up
After selecting the country and the currency, select the Payment Setup as Recurring Payment.
Supported Countries: Recurring Payment is currently supported in Singapore and Australia.
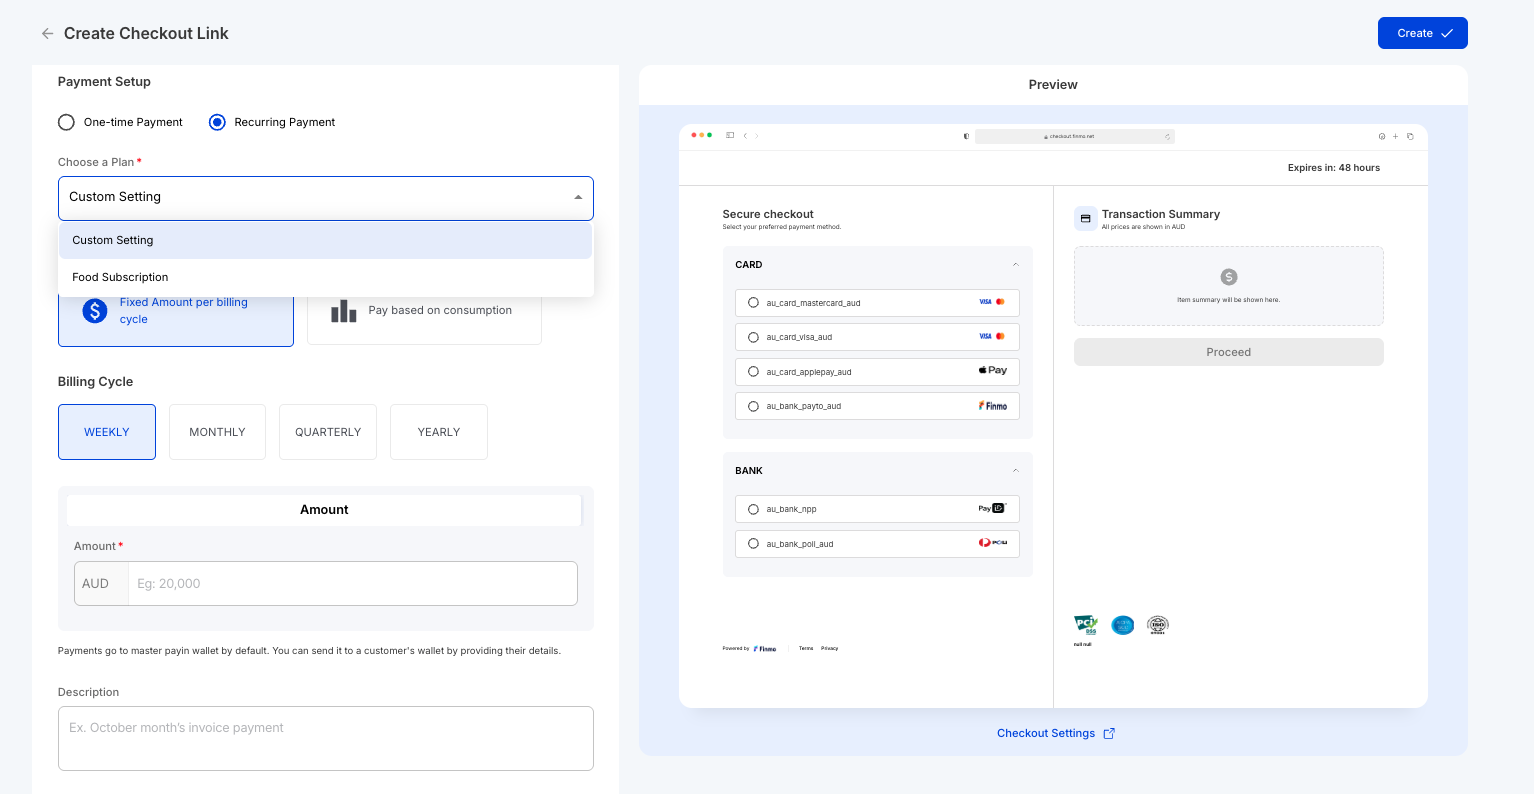
Step 2: Select a Plan
Select an existing Payment Plan to automatically apply a predefined billing template, so you don’t need to choose a pricing model or billing cycle. Alternatively, select Custom Setting to create a new recurring payment and define the pricing model and the billing cycle that best fit your business and customer needs.
Step 3: Select the Pricing Model & the Billing Cycle
Select a pricing model and a billing cycle that align with your business model.
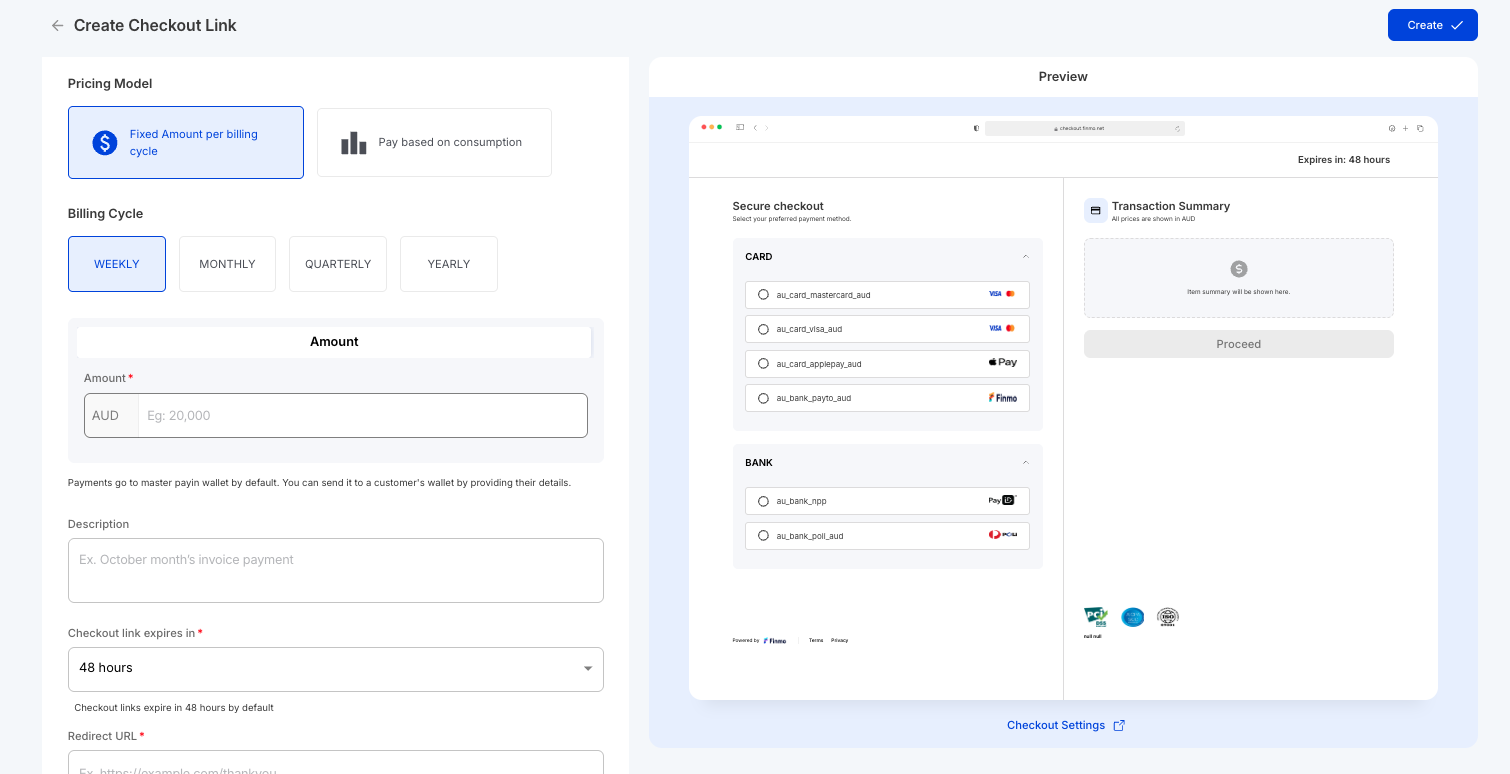
| Field | Description |
|---|---|
| Fixed Amount per billing cycle | Select this when you want to charge a fixed amount at regular intervals (e.g., $50 every month). Best suited for memberships, subscriptions, or retainers. |
| Pay based on consumption | Select this when the billed amount will vary based on customer usage, for example, API calls, minutes, or units consumed. This allows you to trigger a payin for a specific amount when the recurring payin is created. |
Step 4: Enter the other fields
Enter the Amount, Description, Link Expiration Window & the Redirect URL
| Field | Description |
|---|---|
| Amount | Select a single amount when the customer is being charged a fixed total for the entire order, or select an item split when the customer is being charged for individual products or services separately. |
| Description | Provide an optional description for reference |
| Checkout Link Expiration | Configure the expiration window. By default, all checkout links expired in 48 hours |
| Redirect URL | Provide a URL to redirect customers after payment |
Step 5: Generate the Checkout URL
Upon filling the required fields, click on the Create CTA at the top right. Share the URL with your customers.
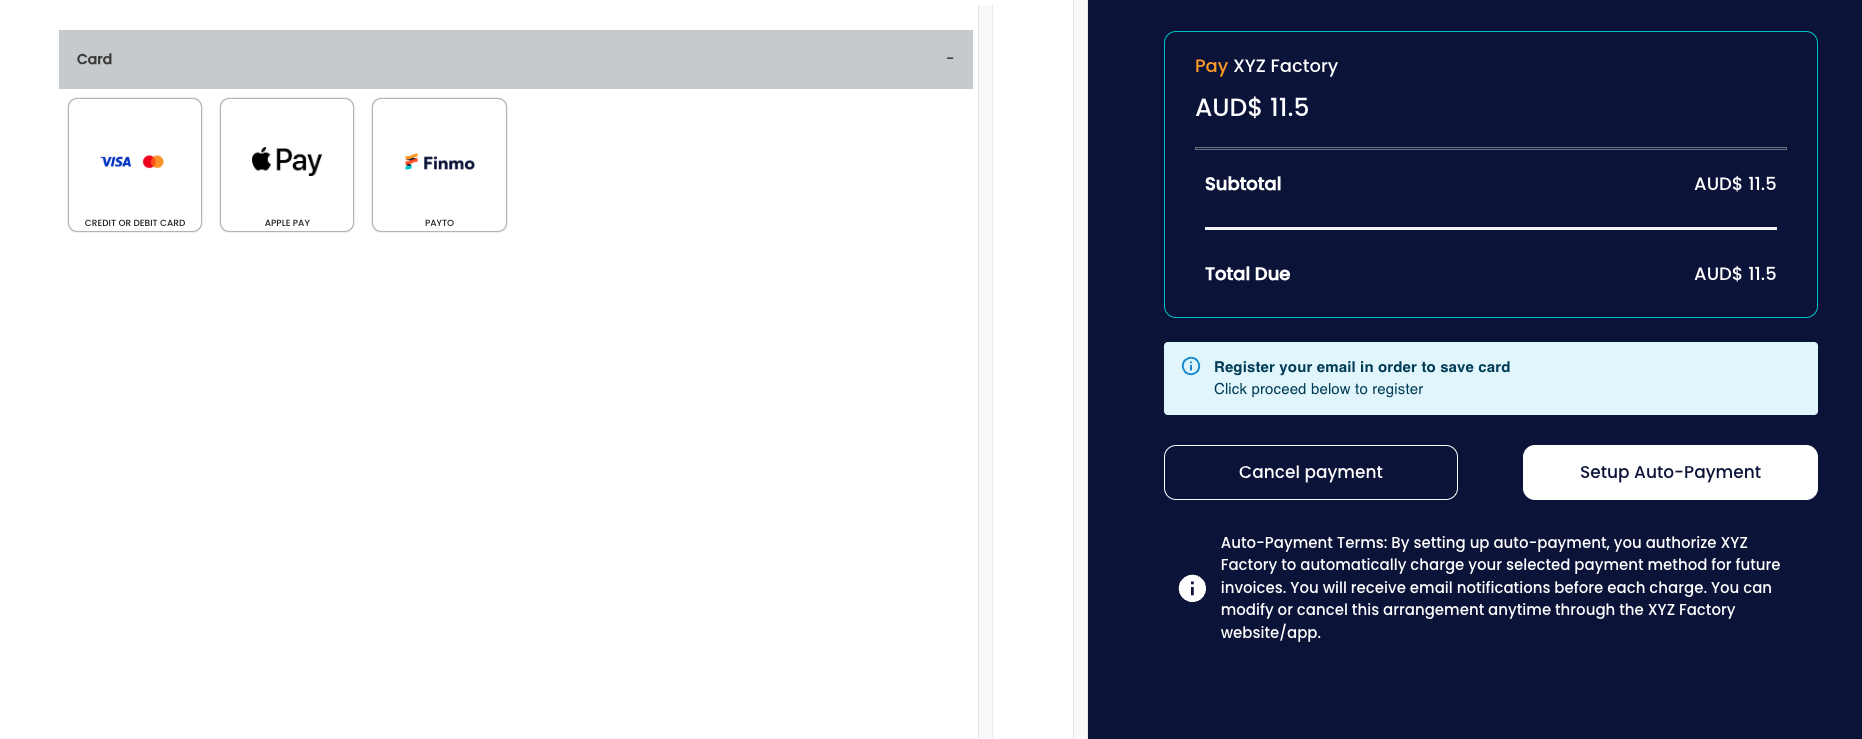
Step 6: Share the Checkout URL with your customers
When your customers open the URL, they will be able to set up auto payments with their preferred payment method.
Updated 9 months ago